'93 Hatch DD Build
-
Andrew
- Posts: 1000
- Joined: Mon Jun 29, 2009 3:28 pm
'93 Hatch DD Build
Projects like this take time, I'm very glad you are saving it though! I have a soft spot for 92-95 hatches!
'93 Honda Civic VX - 35mpg+ Boosted Daily Driver
'93 Acura Integra - In progress, wire tuck, brake line tuck, Budget Built. :gape:
'93 Acura Integra - In progress, wire tuck, brake line tuck, Budget Built. :gape:
-
ryansDc5

- Posts: 1038
- Joined: Mon Aug 25, 2008 11:16 pm
'93 Hatch DD Build
i wish i had room to do a restoration kind of build like this. would be too much fun
'05 NFR s2000
-
ZChatchie
- Posts: 17
- Joined: Mon Jul 30, 2012 9:08 am
'93 Hatch DD Build
dang really coming along lol alot farther than my 92 hatch has hahahahaha. im thinking about buying a single cam ZC head thats going on a dual cam ZC block, so im hoping i dont have to do anything to my p06 ecu for it to run right lol.
ZC power is the way to go
-
jpfeffer

- Posts: 96
- Joined: Thu Jan 26, 2012 8:49 pm
'93 Hatch DD Build
Same here! It was a no brainier when I decided to do a budget build like this! Can't wait to see mine done!Andrew;299106 wrote:Projects like this take time, I'm very glad you are saving it though! I have a soft spot for 92-95 hatches!
Yeah, my stepdad owns a body shop. Makes this type of thing much easier with the tools, the space, and the expertise.ryansDc5;299114 wrote:i wish i had room to do a restoration kind of build like this. would be too much fun
I made sure to get the full swap with the P07 ECU. Didn't want anything TOO tricky for this. Lol.ZChatchie;299125 wrote:dang really coming along lol alot farther than my 92 hatch has hahahahaha. im thinking about buying a single cam ZC head thats going on a dual cam ZC block, so im hoping i dont have to do anything to my p06 ecu for it to run right lol.
John 3:16-17
-
G0VTCH33ZE

- Posts: 82
- Joined: Mon Feb 28, 2011 7:45 pm
'93 Hatch DD Build
Very nice! Liking the direction this is heading!
There are cars that take you from point A to point B, and then there are cars that eat your family, worship Satan, and purposefully transmit STDs.
95 S14-94 Civic-95 Civic LS-T
95 S14-94 Civic-95 Civic LS-T
-
MaSSaCrE
- Posts: 2167
- Joined: Tue Apr 29, 2008 2:53 am
'93 Hatch DD Build
Josh if you ever need some help\tools\whatever make sure to send me a pm on here\fb\ or text me. Ill get blakes lazy ass up and well come help out with stuff.
-
jpfeffer
- Posts: 96
- Joined: Thu Jan 26, 2012 8:49 pm
'93 Hatch DD Build
Thanks everyone!
Got a little bit more done on the car yesterday (Tuesday). Just to give you an idea of what I started with for the day, here's the load of materials I picked up from Licari Auto Body yesterday morning, along with my new hood latch. I'm using Omni products through the primer, then using DBU on the paint. Omni is a little lower quality, but works great for primer. DBU is higher quality and will last.
[CENTER]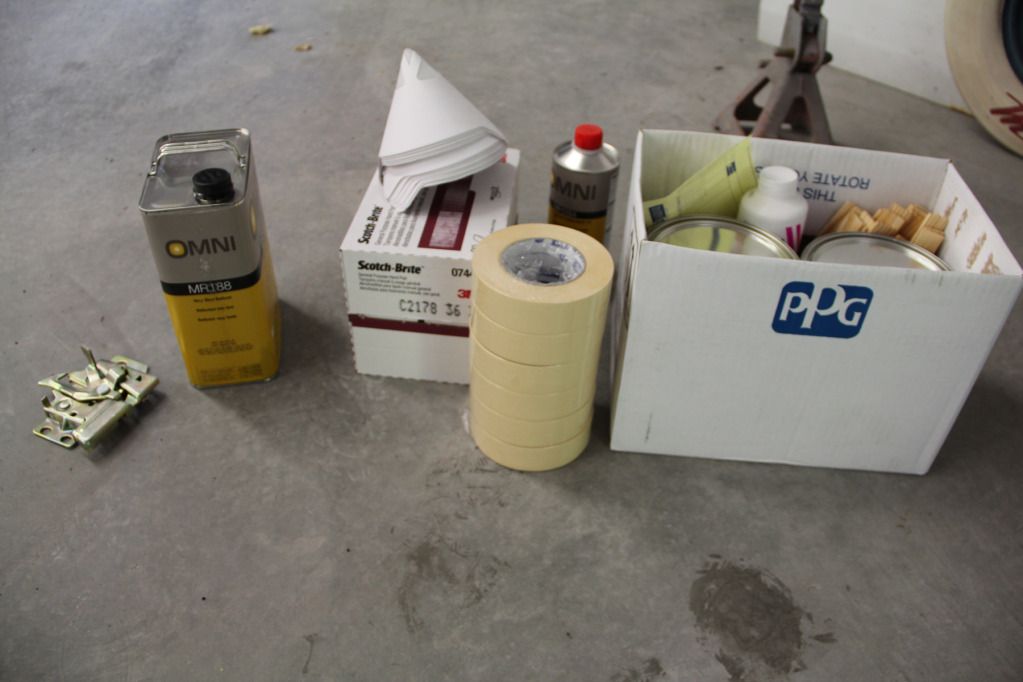 [/CENTER]
I started out the day by grinding off the studs on the firewall. These were originally used to mount the fuel filter, brake proportioning valve and other random bits of hardware that won't be there anymore. Grinding them off worked much better then pulling them out with a pair of vice grips. The hole left by pulling them out was too large to just overlook, while grinding them left a semi-smooth surface after sanding it with 80 and 150 grit paper on the DA.
[CENTER]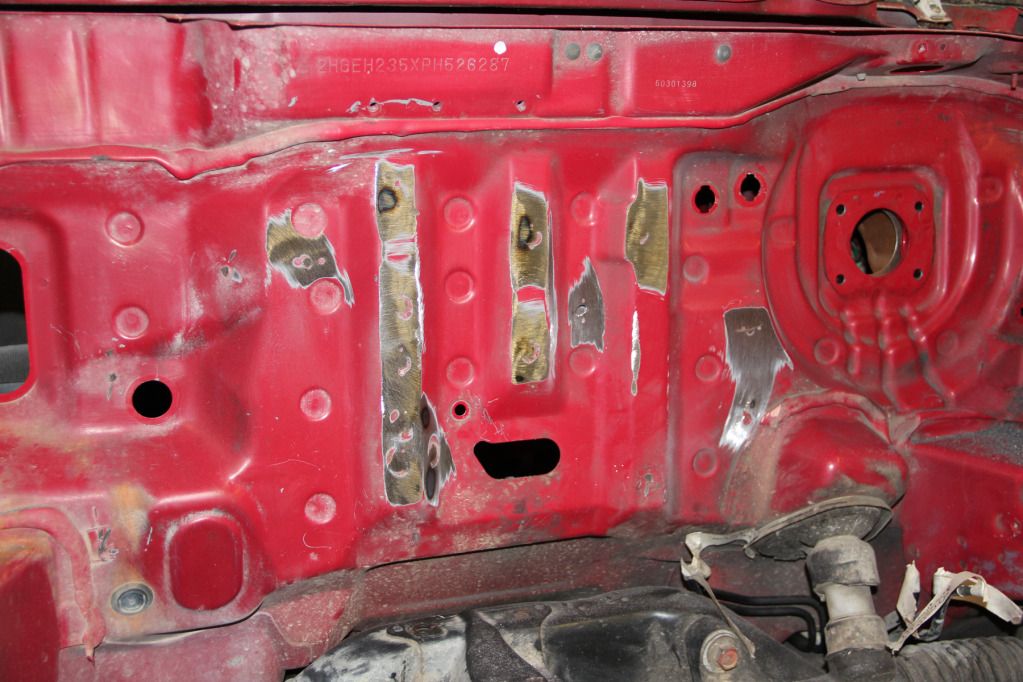 [/CENTER]
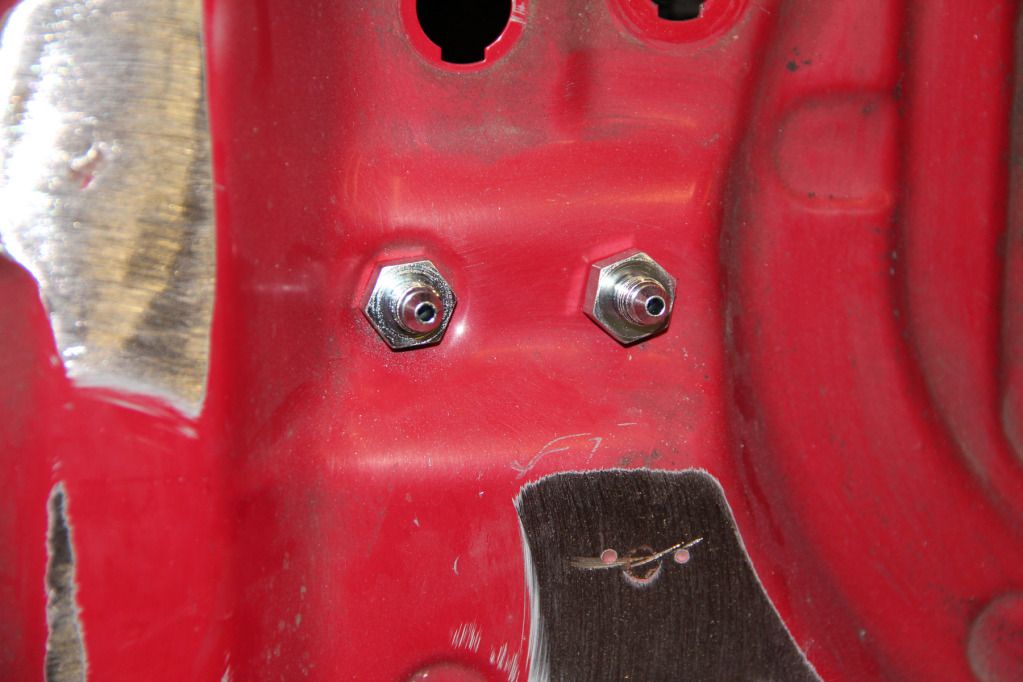
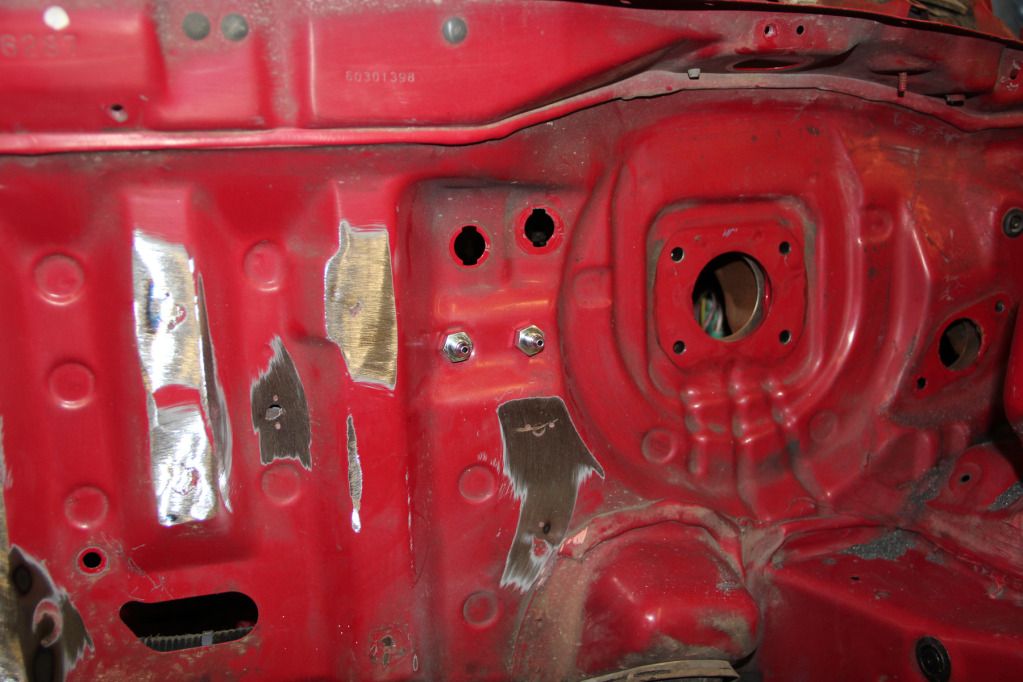
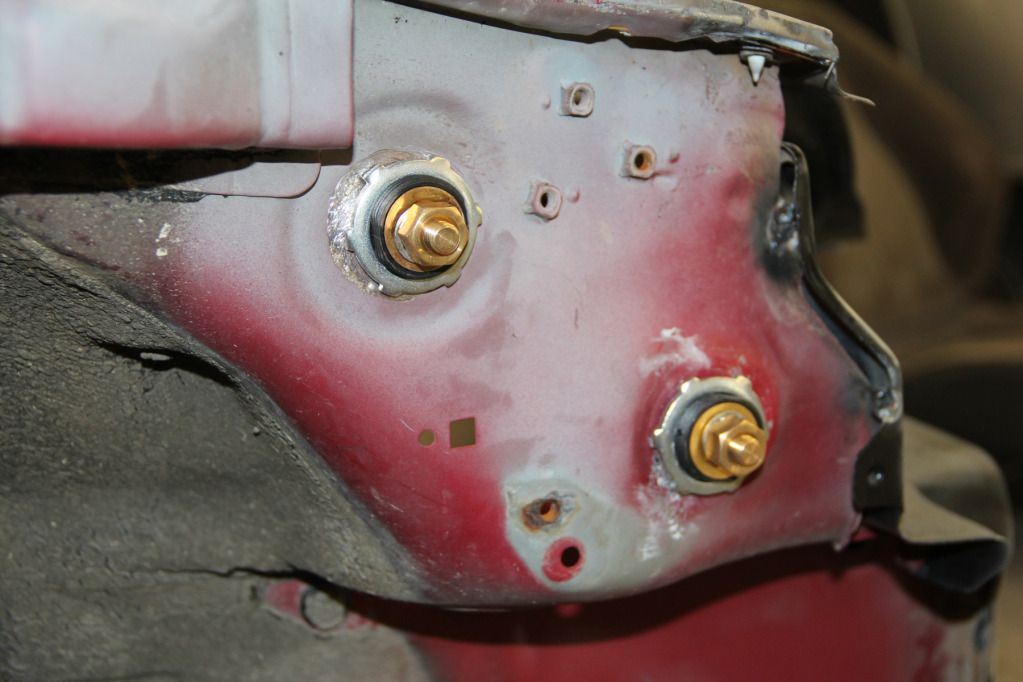
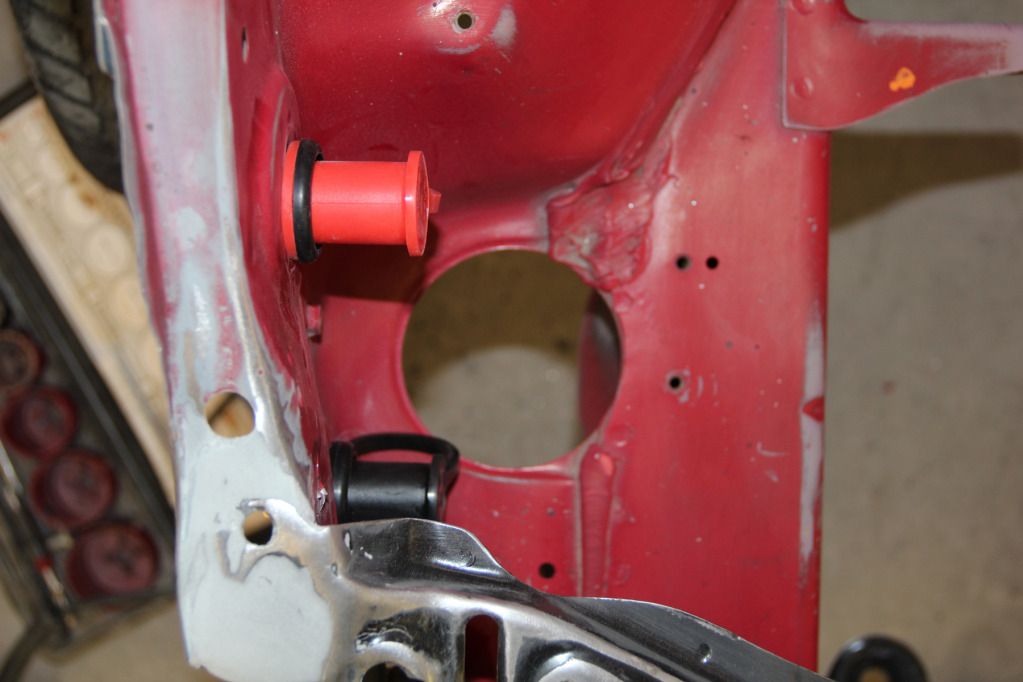
Then I drilled two new holes next to where the brake booster will mount, and below where the throttle cable comes through the firewall at. -3 AN bulkheads will mount in these holes and the new brake lines will come from the master cylinder and right into these bulkheads (then to the PV and everywhere else). No more mess of lines in the bay. Here's a few photos of the bulkheads mocked up.
[CENTER]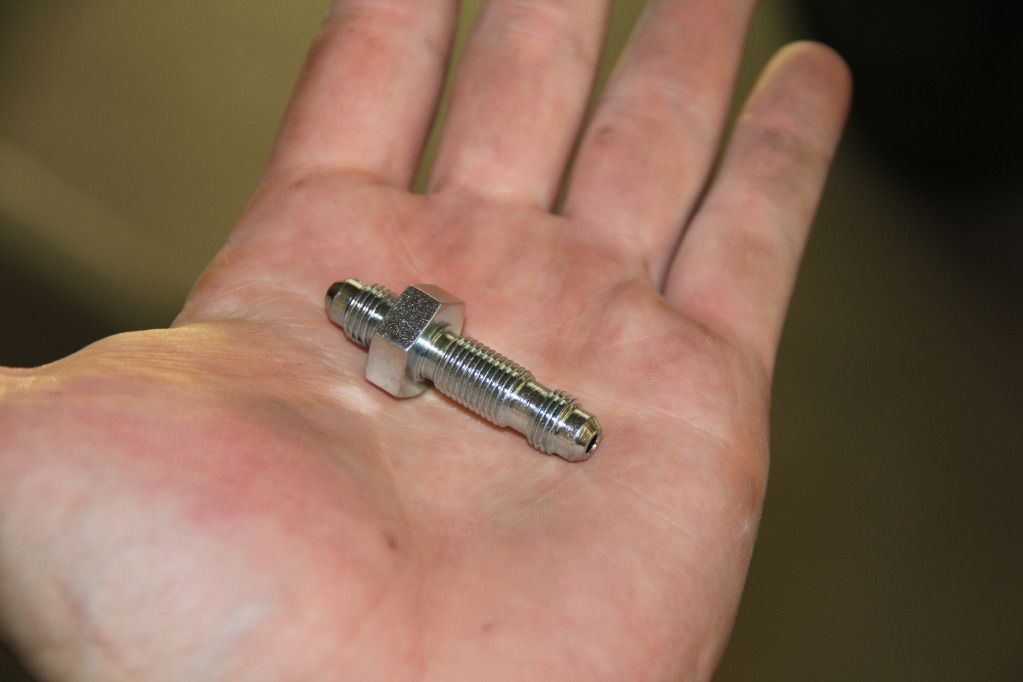
 [/CENTER]
I took a red Scoth Brite (sort of like a Brillo pad for washing dishes, but made for scuffing up paint in auto body shops) and scuffed the entire bay.
[CENTER]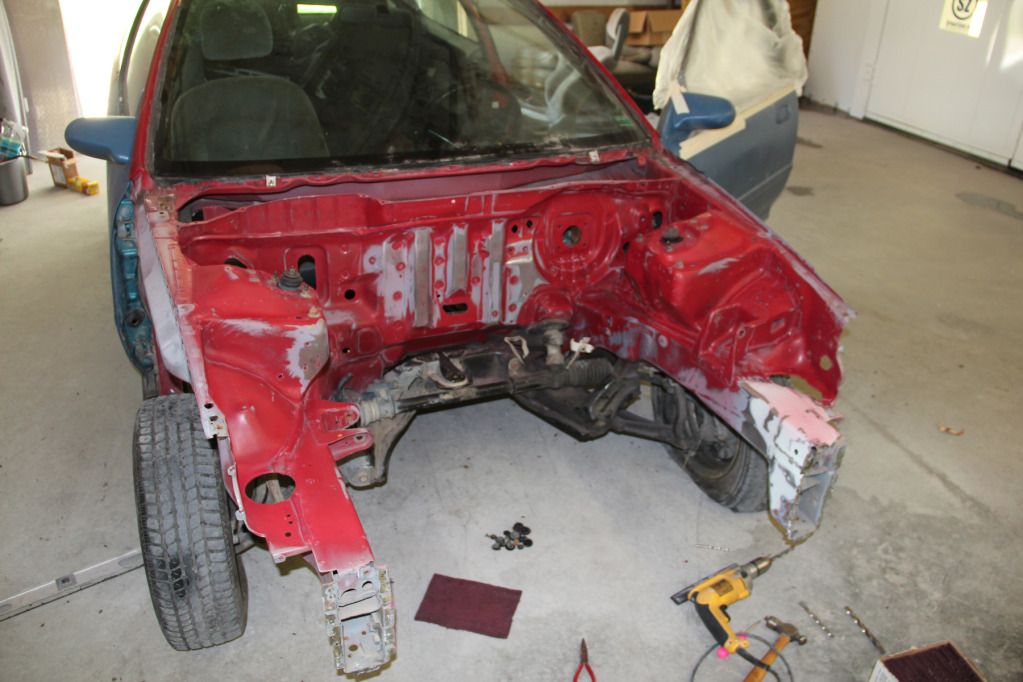 [/CENTER]
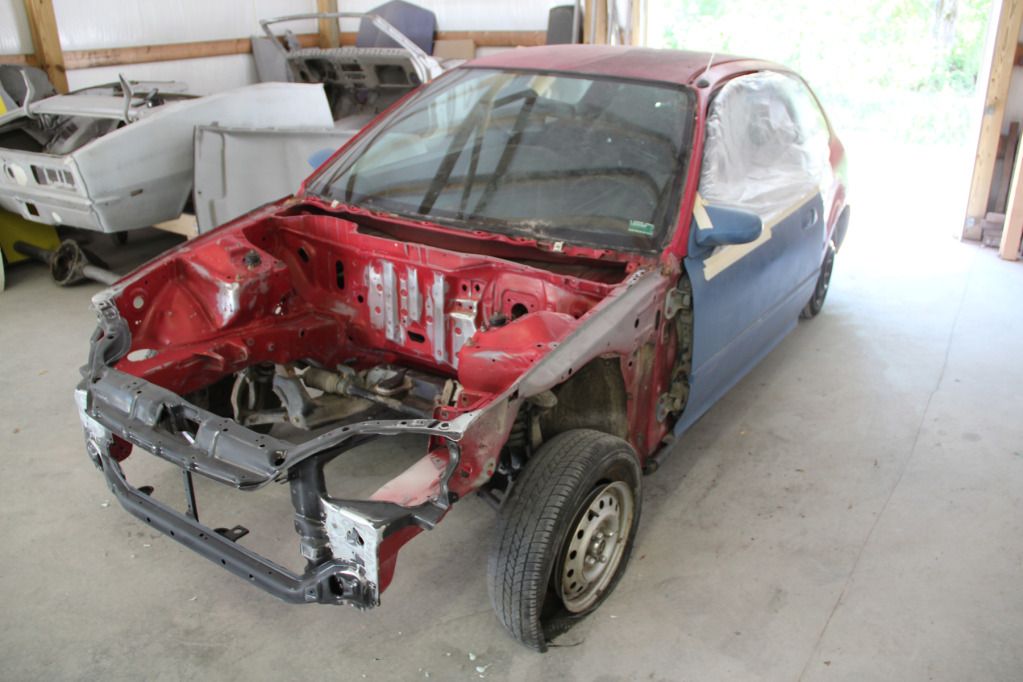
Then mounted the radiator support and welded it on for good. No pics before the body work on the welds, but I then smoothed the welds out with body filler, knocked it down with a DA, and called it good.
[CENTER]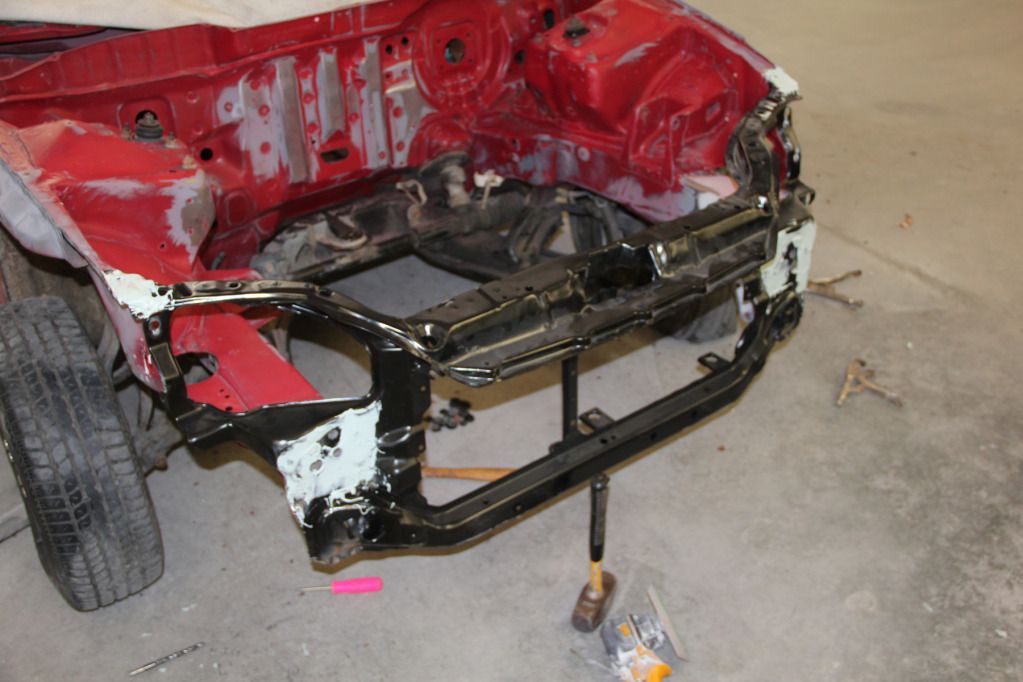
 [/CENTER]
Measuring corner to corner with this new support welded in, I was off by 1/16", so all things considered, I'd say the frame rail fix and everything went pretty well. Shouldn't have any issues with the front end (bumper, fenders, hood, lights, etc) fitting properly. But we'll know for sure once I get those parts.
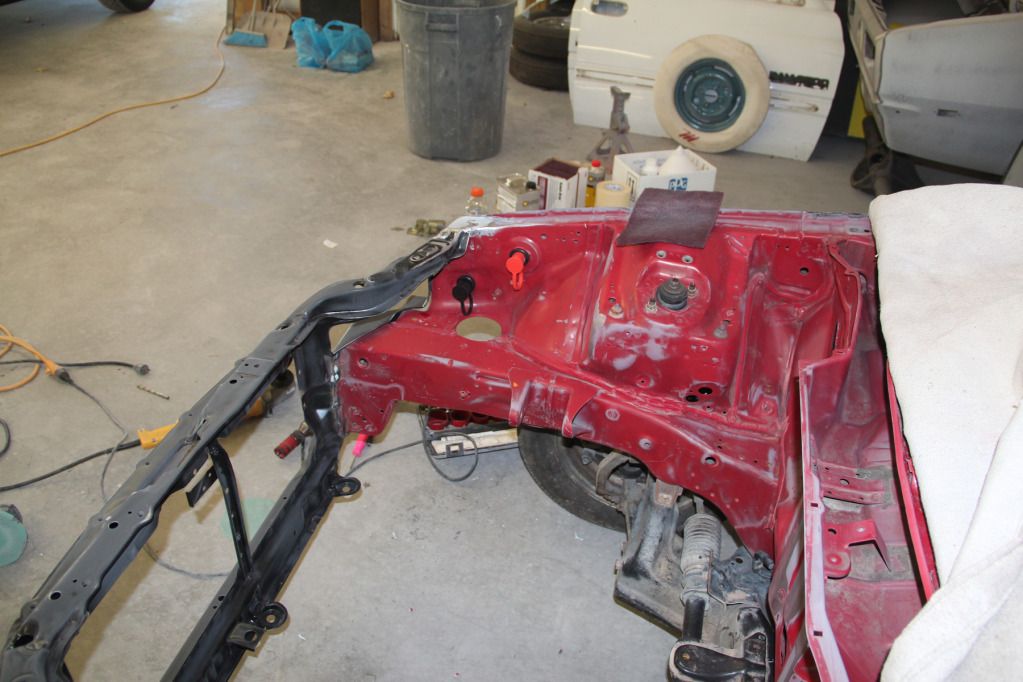
Using one of the original holes in the front passenger corner, and drilling out a second, I mounted the new battery terminals since it'll be relocated underneath this spot.
[CENTER]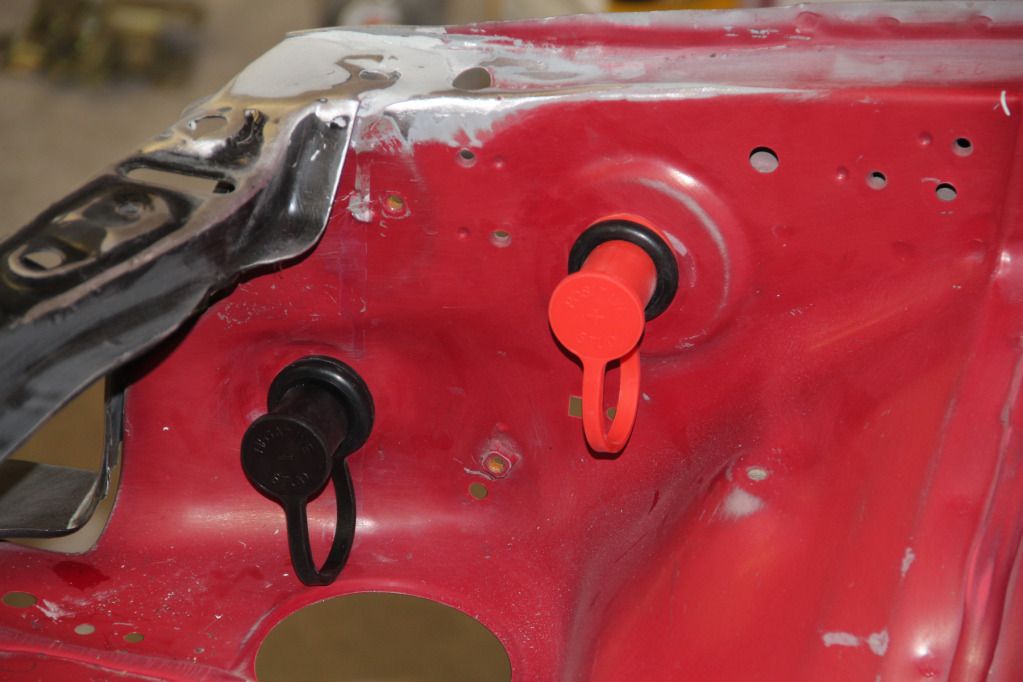
 [/CENTER]
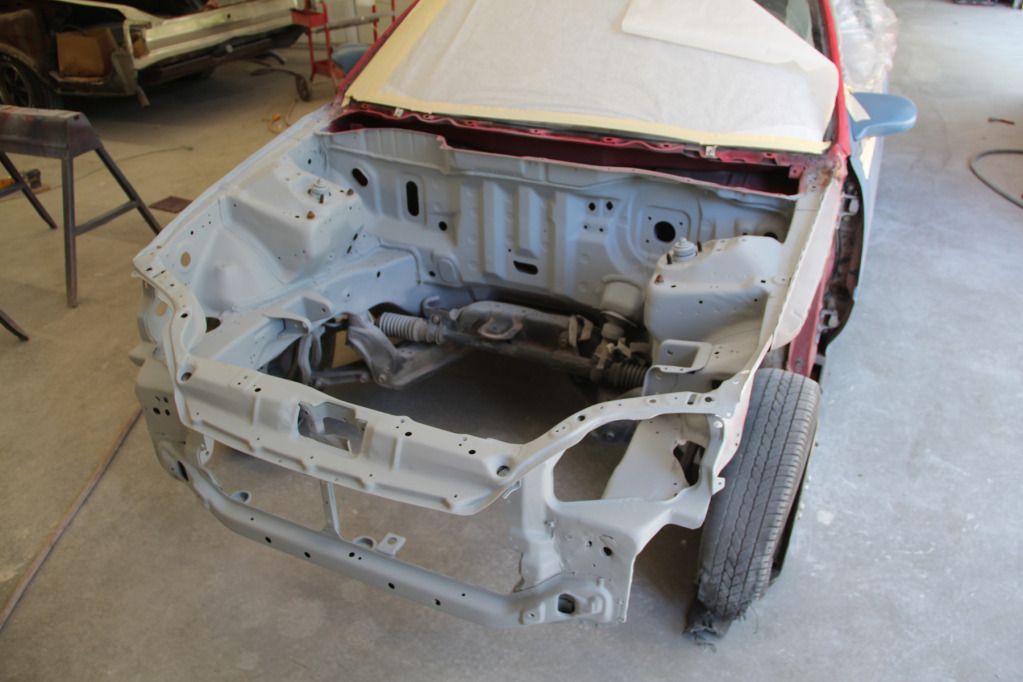
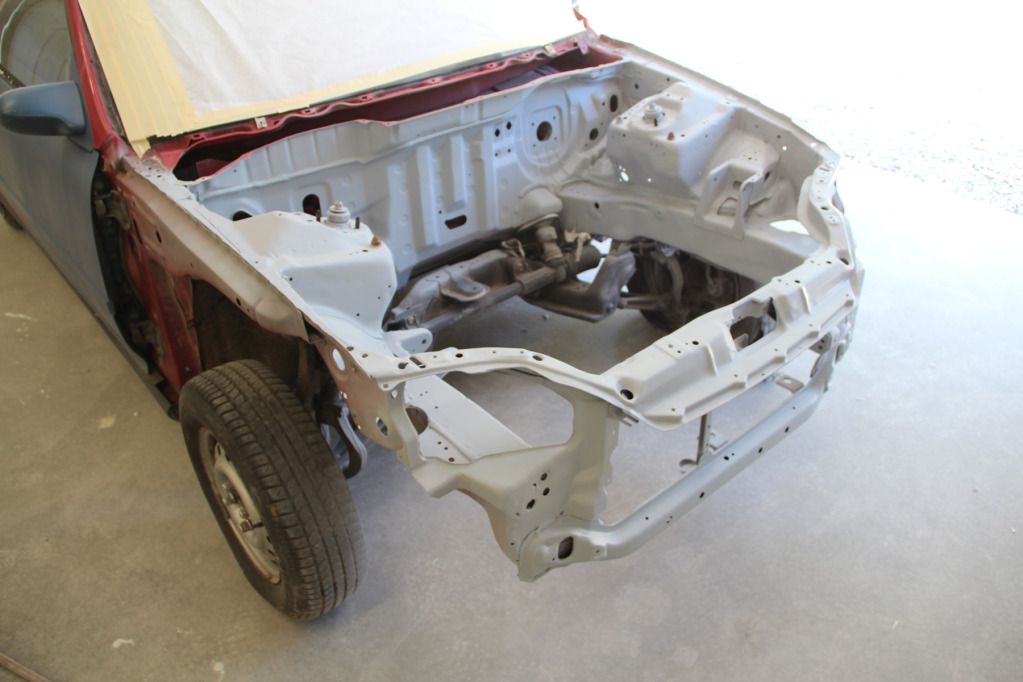
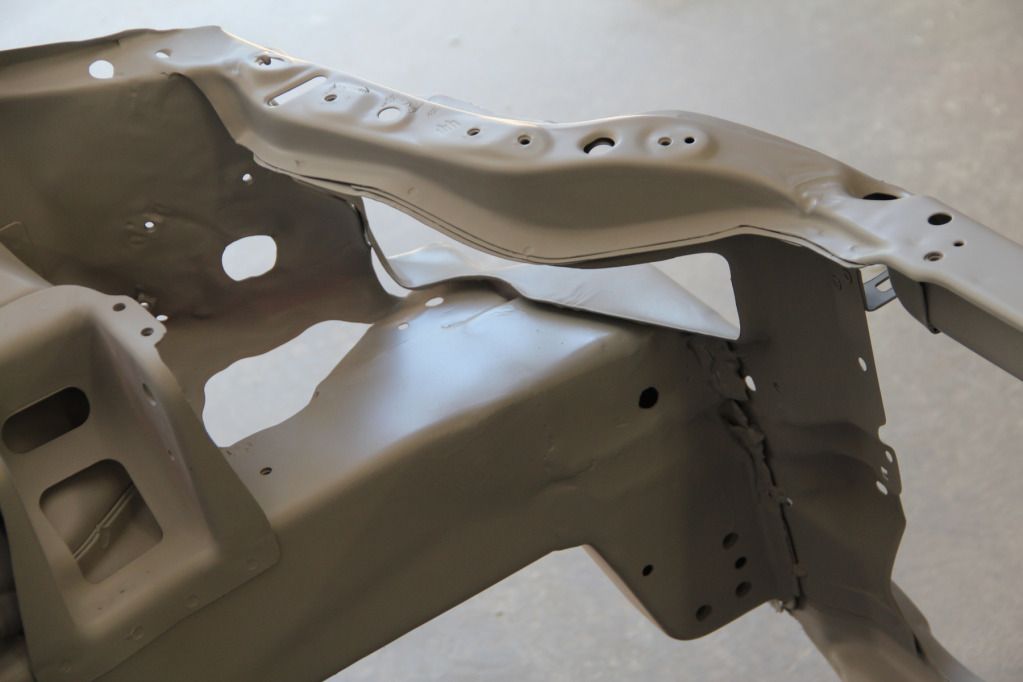
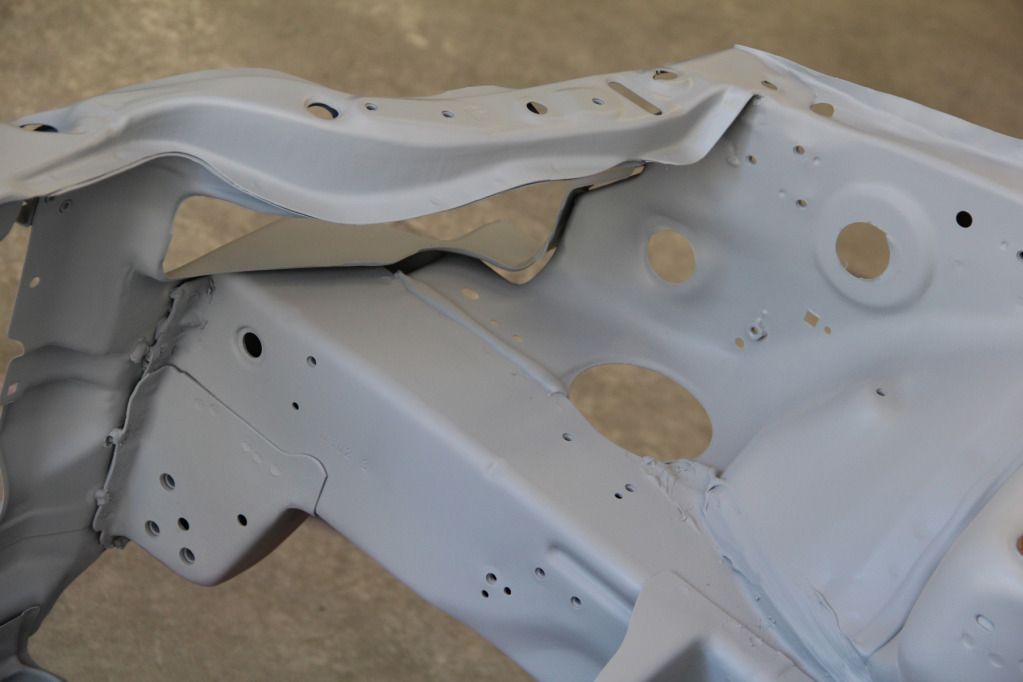
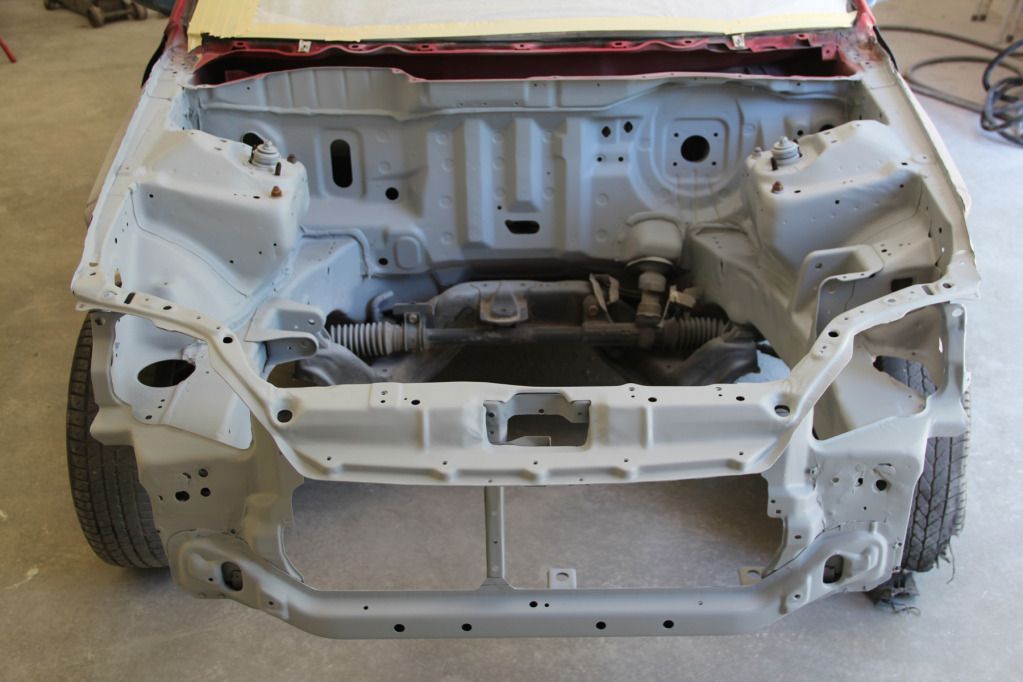
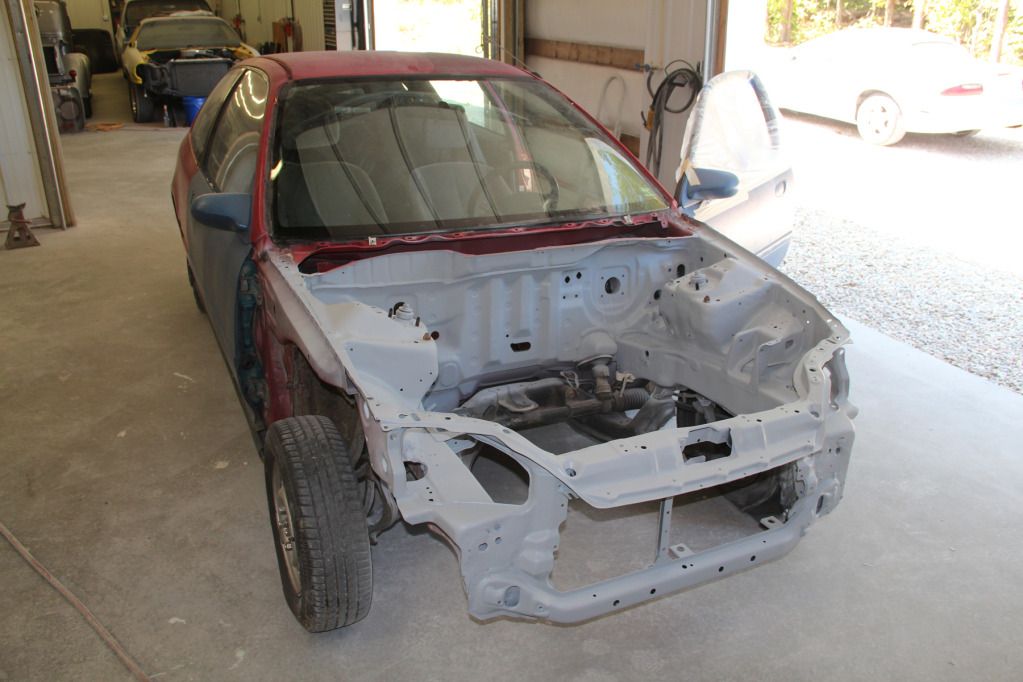
Then I rescuffed that area, taped off the windshield (that lower support will be coming out to be cleaned and repainted so I didn't bother taping it off), and primed the bay.
[CENTER]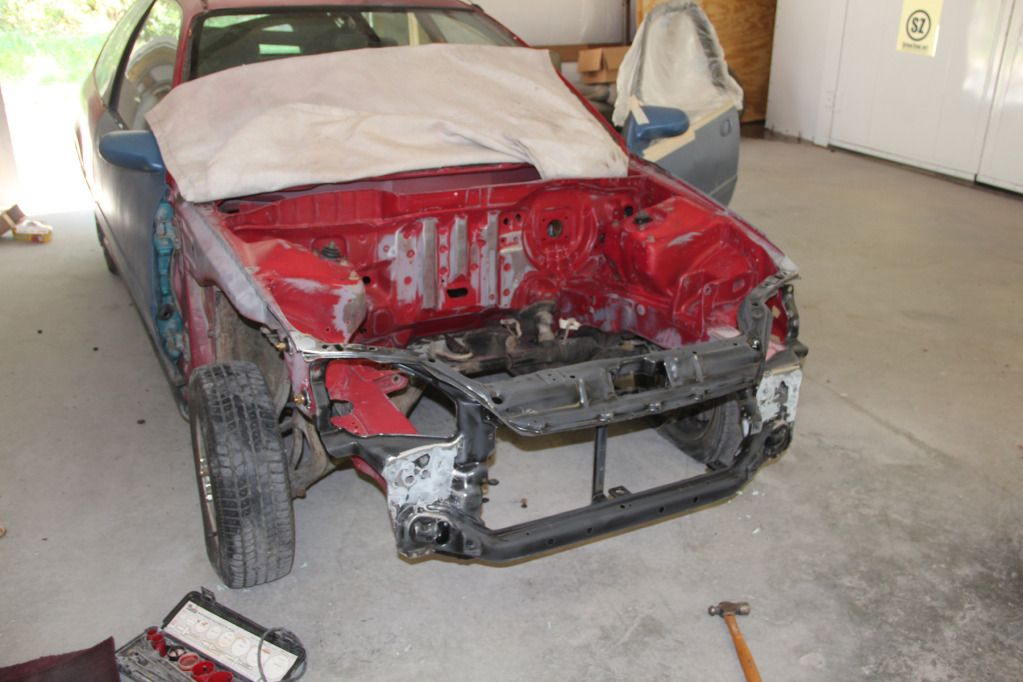
 [/CENTER]
The color is oddly similar to primer color, but it's a gloss color, so this makes me pretty excited to see the bay getting all one color in it. The engine compartment should be all downhill from here. Once the body work on the car is done, I'll be able to paint the bay and drop the motor in, but it's finally reached a point where it's all putting stuff back in to the bay instead of tearing things out.
I also tried working on the engine last night. Couldn't get the crank pulley bolt out, and broke my 3/8" ratchet trying to get it off of there. I was pretty frustrated by that point considering I had been up for over 24 hours (worked 3p - 7a at work the night before, and worked on the car all day) so I said screw it, covered the block and stand back up and took a shower before passing out.
Should be more progress before too long. Just need to go get a breaker bar, a new ratchet, and a torque wrench before I start cleaning and putting the engine back together. It should be all downhill once this crank pulley comes off.
Got a call from my powder coat guy saying my valve cover was ready to pick up, so when I go to get that, I'll be dropping off a few brackets to him for the engine to coat as well. It's all starting to finally come together!
Thanks for checking in here!
Got a little bit more done on the car yesterday (Tuesday). Just to give you an idea of what I started with for the day, here's the load of materials I picked up from Licari Auto Body yesterday morning, along with my new hood latch. I'm using Omni products through the primer, then using DBU on the paint. Omni is a little lower quality, but works great for primer. DBU is higher quality and will last.
[CENTER]
[/CENTER]I started out the day by grinding off the studs on the firewall. These were originally used to mount the fuel filter, brake proportioning valve and other random bits of hardware that won't be there anymore. Grinding them off worked much better then pulling them out with a pair of vice grips. The hole left by pulling them out was too large to just overlook, while grinding them left a semi-smooth surface after sanding it with 80 and 150 grit paper on the DA.
[CENTER]
[/CENTER]Then I drilled two new holes next to where the brake booster will mount, and below where the throttle cable comes through the firewall at. -3 AN bulkheads will mount in these holes and the new brake lines will come from the master cylinder and right into these bulkheads (then to the PV and everywhere else). No more mess of lines in the bay. Here's a few photos of the bulkheads mocked up.
[CENTER]
[/CENTER]I took a red Scoth Brite (sort of like a Brillo pad for washing dishes, but made for scuffing up paint in auto body shops) and scuffed the entire bay.
[CENTER]
[/CENTER]Then mounted the radiator support and welded it on for good. No pics before the body work on the welds, but I then smoothed the welds out with body filler, knocked it down with a DA, and called it good.
[CENTER]
[/CENTER]Measuring corner to corner with this new support welded in, I was off by 1/16", so all things considered, I'd say the frame rail fix and everything went pretty well. Shouldn't have any issues with the front end (bumper, fenders, hood, lights, etc) fitting properly. But we'll know for sure once I get those parts.
Using one of the original holes in the front passenger corner, and drilling out a second, I mounted the new battery terminals since it'll be relocated underneath this spot.
[CENTER]
[/CENTER]Then I rescuffed that area, taped off the windshield (that lower support will be coming out to be cleaned and repainted so I didn't bother taping it off), and primed the bay.
[CENTER]
[/CENTER]The color is oddly similar to primer color, but it's a gloss color, so this makes me pretty excited to see the bay getting all one color in it. The engine compartment should be all downhill from here. Once the body work on the car is done, I'll be able to paint the bay and drop the motor in, but it's finally reached a point where it's all putting stuff back in to the bay instead of tearing things out.
I also tried working on the engine last night. Couldn't get the crank pulley bolt out, and broke my 3/8" ratchet trying to get it off of there. I was pretty frustrated by that point considering I had been up for over 24 hours (worked 3p - 7a at work the night before, and worked on the car all day) so I said screw it, covered the block and stand back up and took a shower before passing out.
Should be more progress before too long. Just need to go get a breaker bar, a new ratchet, and a torque wrench before I start cleaning and putting the engine back together. It should be all downhill once this crank pulley comes off.
Got a call from my powder coat guy saying my valve cover was ready to pick up, so when I go to get that, I'll be dropping off a few brackets to him for the engine to coat as well. It's all starting to finally come together!
Thanks for checking in here!
John 3:16-17
-
Phate

- Posts: 4601
- Joined: Sun Jan 21, 2007 6:12 am
'93 Hatch DD Build
Dang, awesome work dude!
Midmomofo Built.
If you can't take a joke, FU.
Have an issue? Email me. .

If you can't take a joke, FU.
Have an issue? Email me. .