'93 Hatch DD Build
-
SikofFalln

- Posts: 1065
- Joined: Tue Nov 28, 2006 6:50 am
'93 Hatch DD Build
If you don't want the motor sport look, try some BMW bottle caps. Pretty easy to find and very cheap. I just can't stand those XXRs, if you have ever seen any in real life they look incredibly cheap, but that is likely do to the fact that it is a one piece wheel trying to look like a 2 piece wheel.
3-1-4
-
jpfeffer

- Posts: 96
- Joined: Thu Jan 26, 2012 8:49 pm
'93 Hatch DD Build
Trust me. I wish the budget could afford some 'real' ones, but right now I just have too many other things going on to justify too much more on wheels. (house, wedding, school, etc). Maybe the budget will allow it later on. For now, it's just a DD, so I'm not overly concerned with real/fake wheels.skittle_107;298874 wrote:I vote for real wheels.
$415 shipped to my door on these XXRs in the right size for the EG. The next closest ones that I liked were the 'Stance Mindset' wheels, and it was over twice that. $400 isn't much, but it goes a long way in a budget build like this.skittle_107;298884 wrote:you can get them for under 400 bucks? well then, more power to you

Thanks!areeka;298890 wrote:looking good man, keep it up!
Don't see any bottlecaps FS anywhere close. If you stumble upon a set in the next couple of weeks, I like them, but if not, I'm a pretty big fan of the XXRs for the value and style. Real wheels can come later. DD Civic first, then wedding/house/school, then fancy wheels. Lol.SikofFalln;298909 wrote:If you don't want the motor sport look, try some BMW bottle caps. Pretty easy to find and very cheap. I just can't stand those XXRs, if you have ever seen any in real life they look incredibly cheap, but that is likely do to the fact that it is a one piece wheel trying to look like a 2 piece wheel.
John 3:16-17
-
jpfeffer
- Posts: 96
- Joined: Thu Jan 26, 2012 8:49 pm
Update: August 2nd, 2012
So, I had a couple days off, and decided to spend them working on the body of the car instead of the engine. I didn't get anywhere near as far as I would have liked, but it's making progress.
I dropped my VC off at Gateway Powder Coating Wednesday morning after work. He's charging me $75 to chemical dip to remove the oil & grease, sandblast, powder coat the VC in a wrinkle red finish, and to brush the letters and H emblem after it's coated. I'm pretty ecstatic about the price and excited to see it finished. Turn around time is around 3 days for him, but I told him it's not a huge rush since I won't need it for at least a week or two. Very impressed with his customer relations so far.
I started off Wednesday morning with this view after removing my seats (they are just sitting in place, not bolted in or anything).
[CENTER]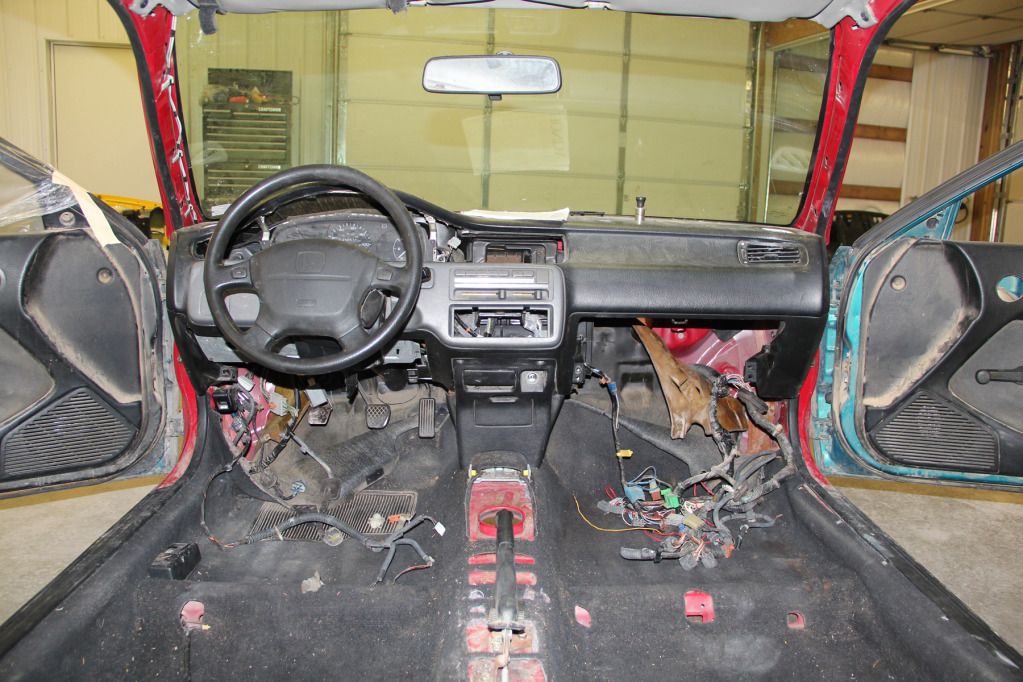 [/CENTER]
Then I removed the dash:
[CENTER]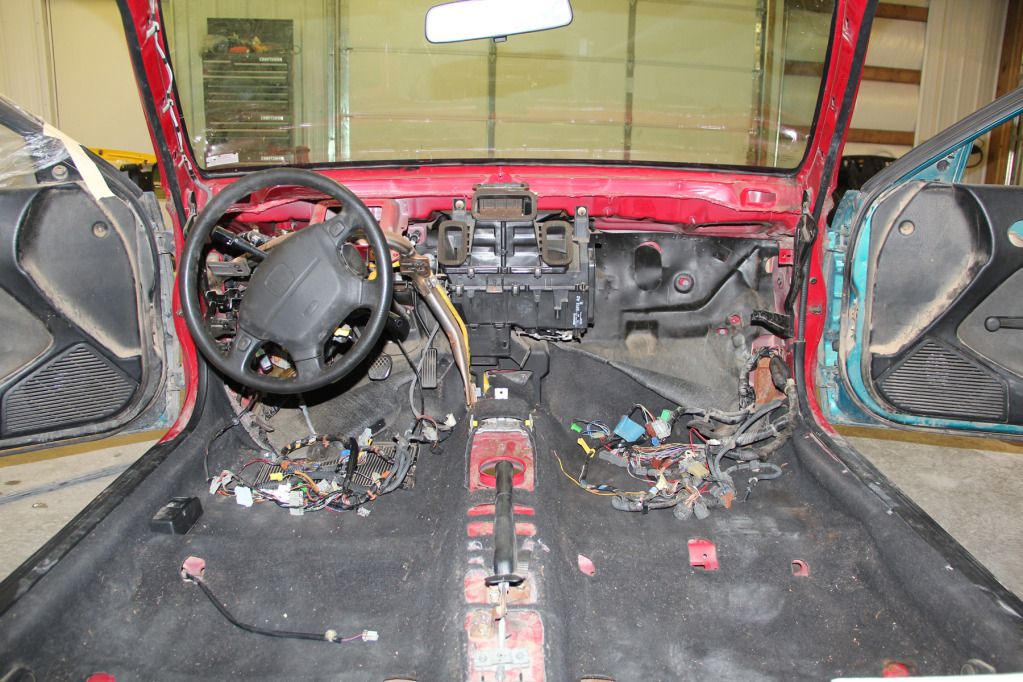 [/CENTER]
And I also removed the carpet since the whole car smelled like mouse urine. What I found behind the thick rubbery piece on the firewall was about 1,000 (literally) ants and winged bugs.
[CENTER]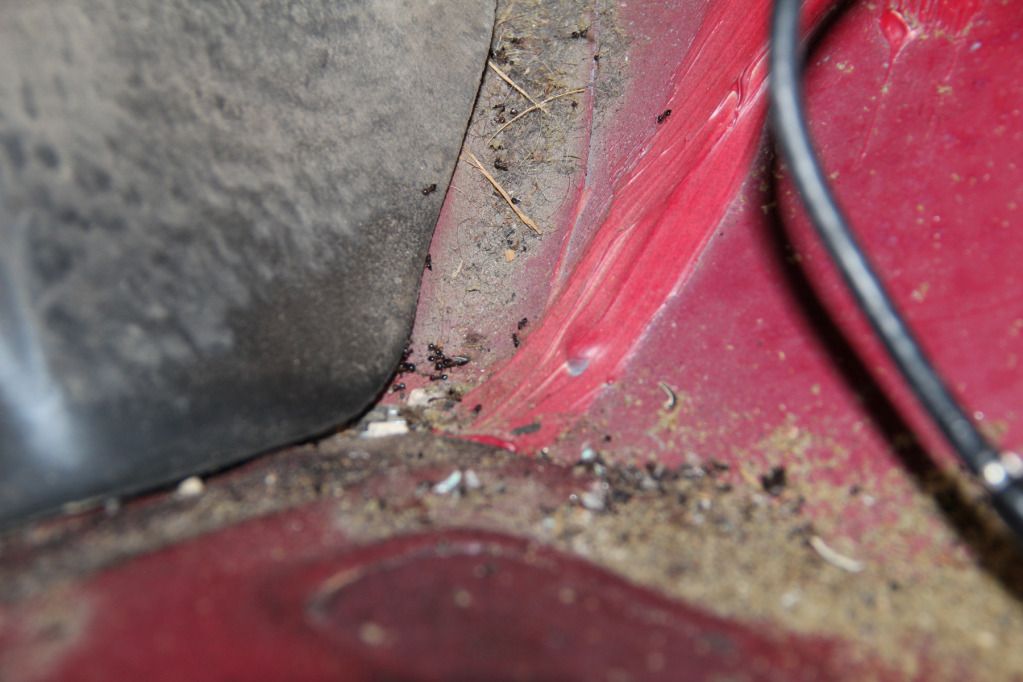 [/CENTER]
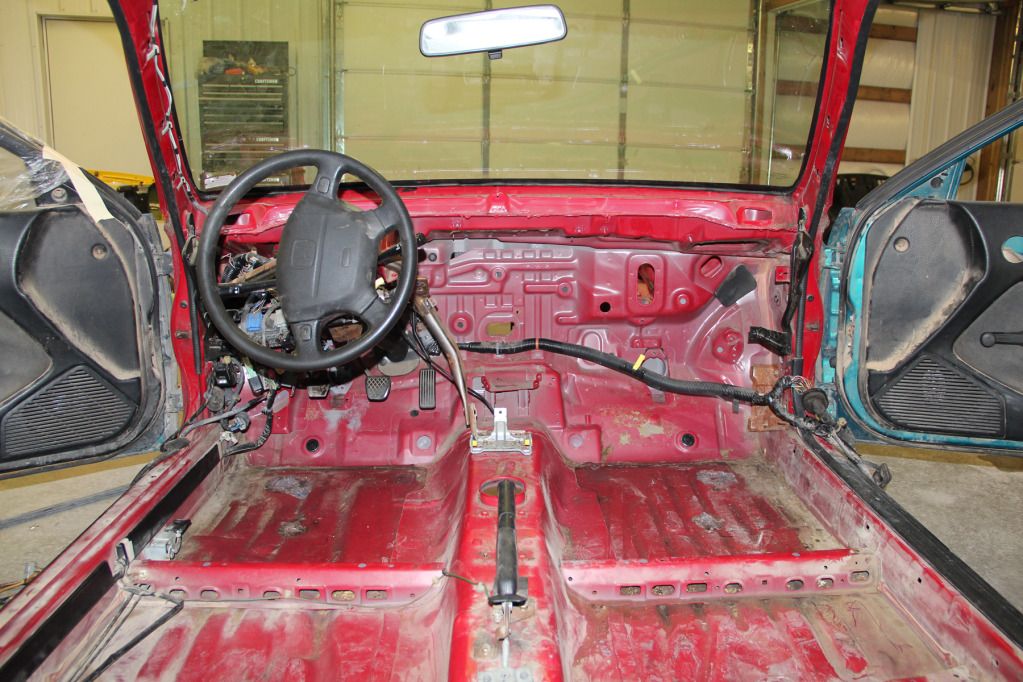
I sucked them all up with the ShopVac and was glad it was 'just' bugs, and not mice like I expected. After removing the carpeting though, there were shells everywhere; evidence that mice had definitely been in the car for a while, but I already knew that since we saw one when we loaded the car on the trailer at Caleb's. Here's a shot with the carpeting removed, and I think the driver's side was vacuumed already when I decided to take a pic.
[CENTER]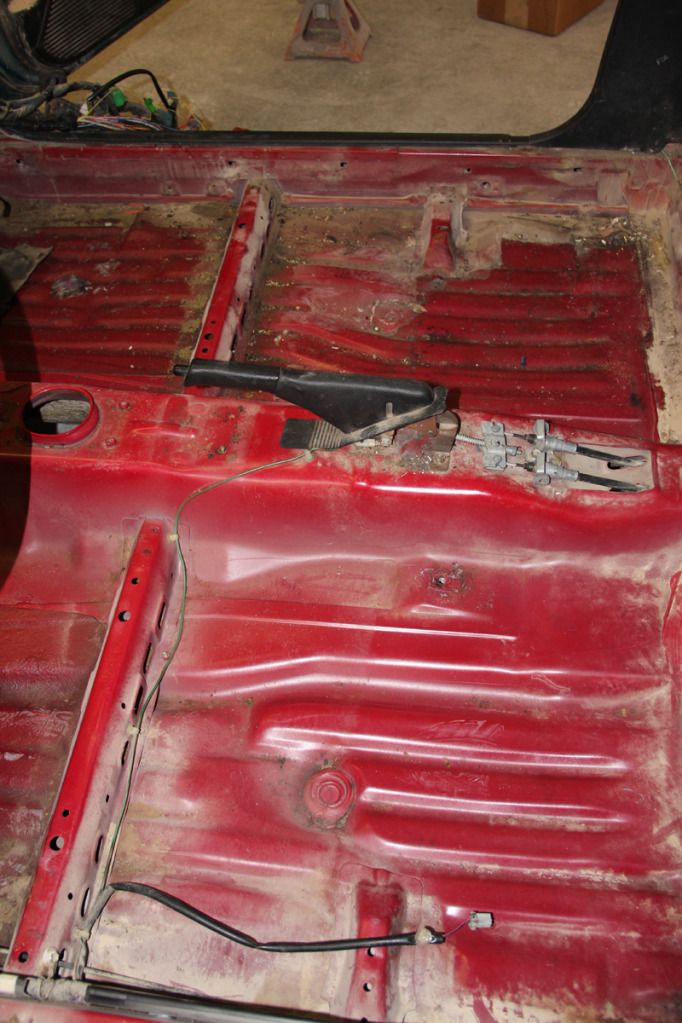
 [/CENTER]
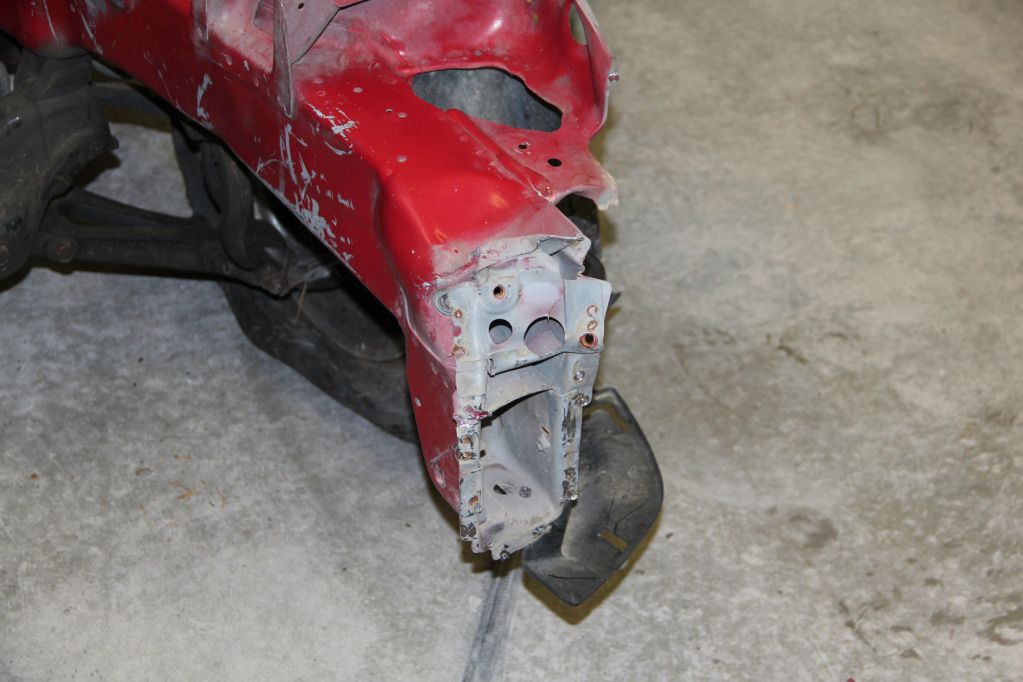
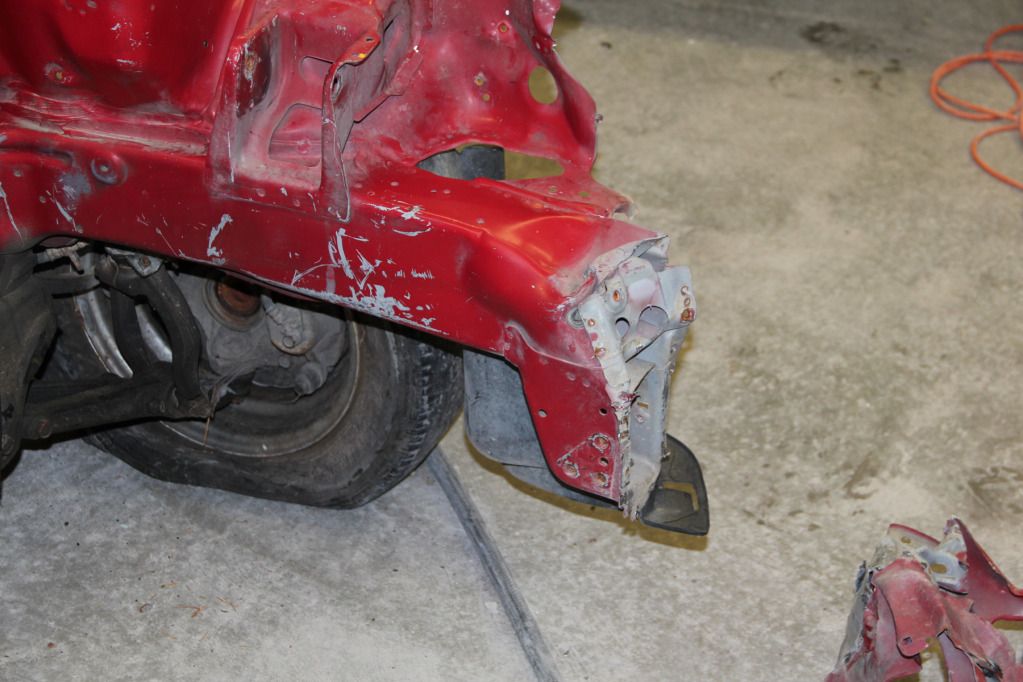
Then I drilled out the spot welds on the radiator support and removed it, revealing a lot more damage to that driver's side frame rail than I thought.
[CENTER]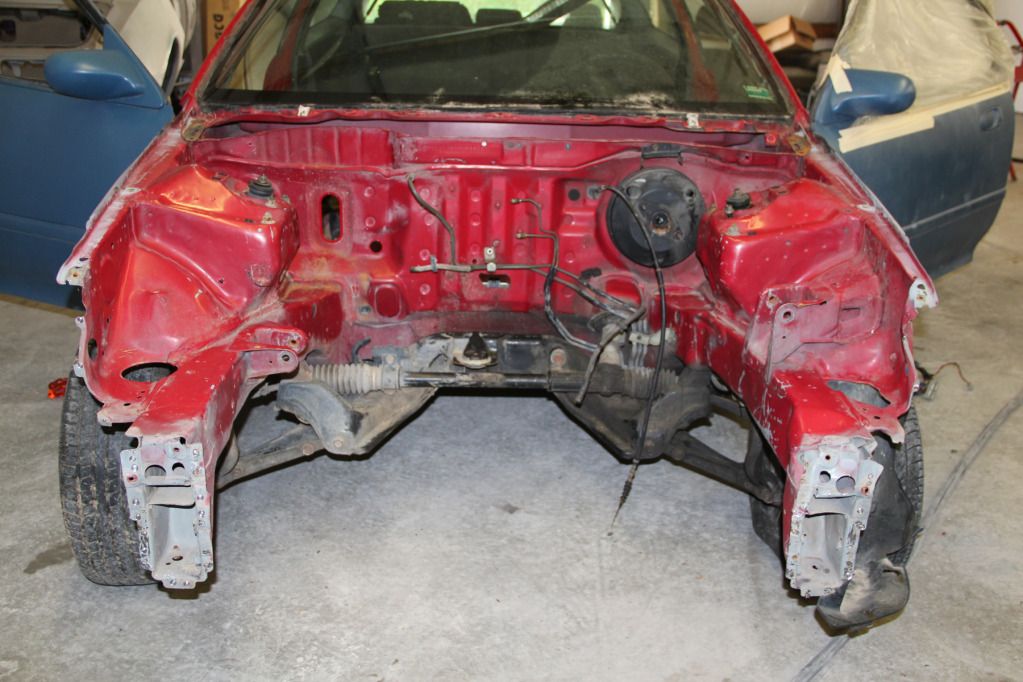
 [/CENTER]
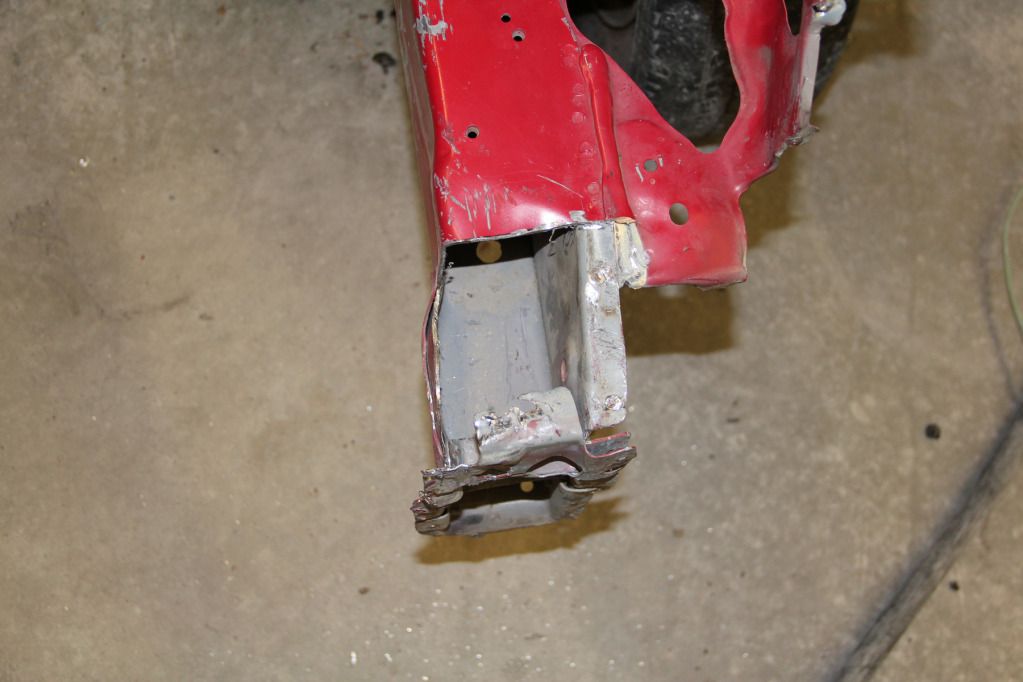
I tried working that sheet metal as much as possible, but I couldn't get it to a place where I felt comfortable welding the new support to it, or safe driving with it crunched so far already. So, I removed the bent part, and reformed it off the car where it was a lot easier to deal with.
[CENTER]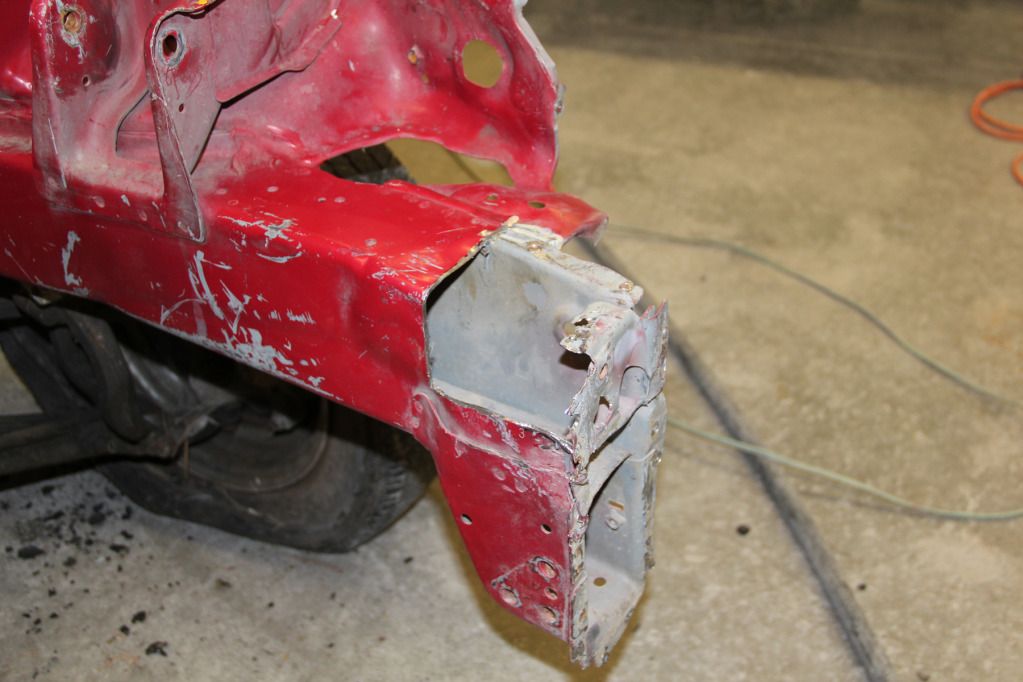
 [/CENTER]
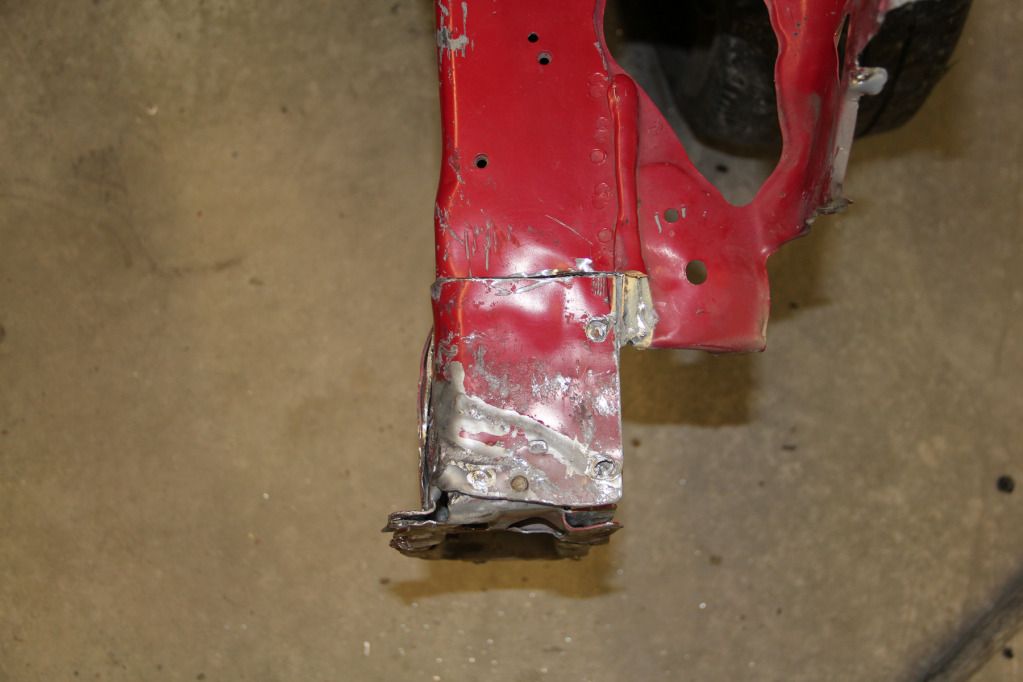
And after working it some:
[CENTER]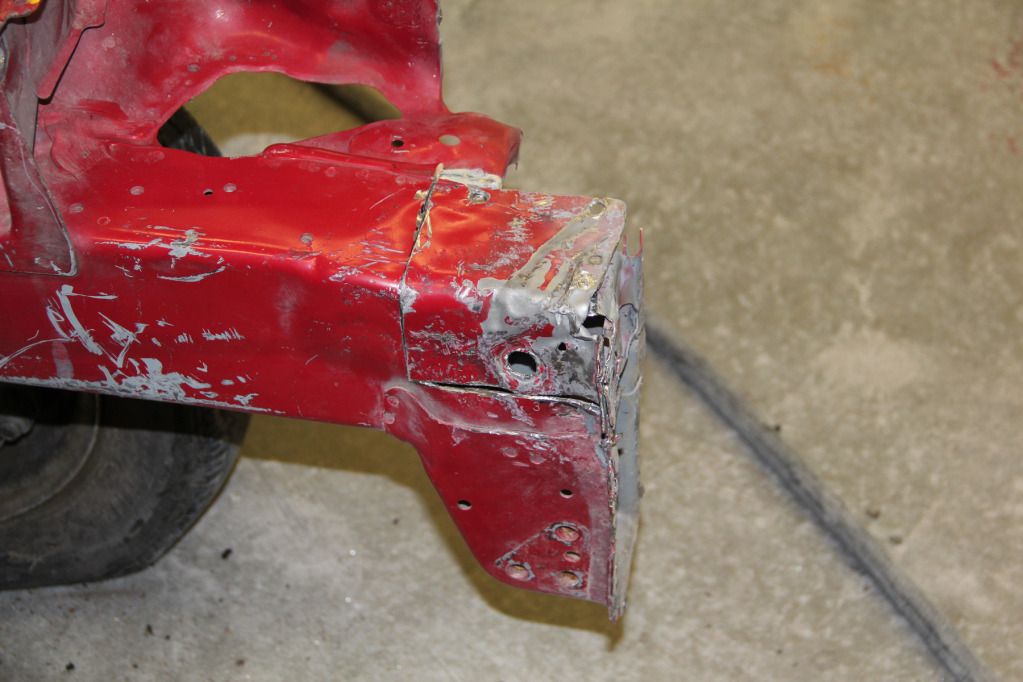
 [/CENTER]
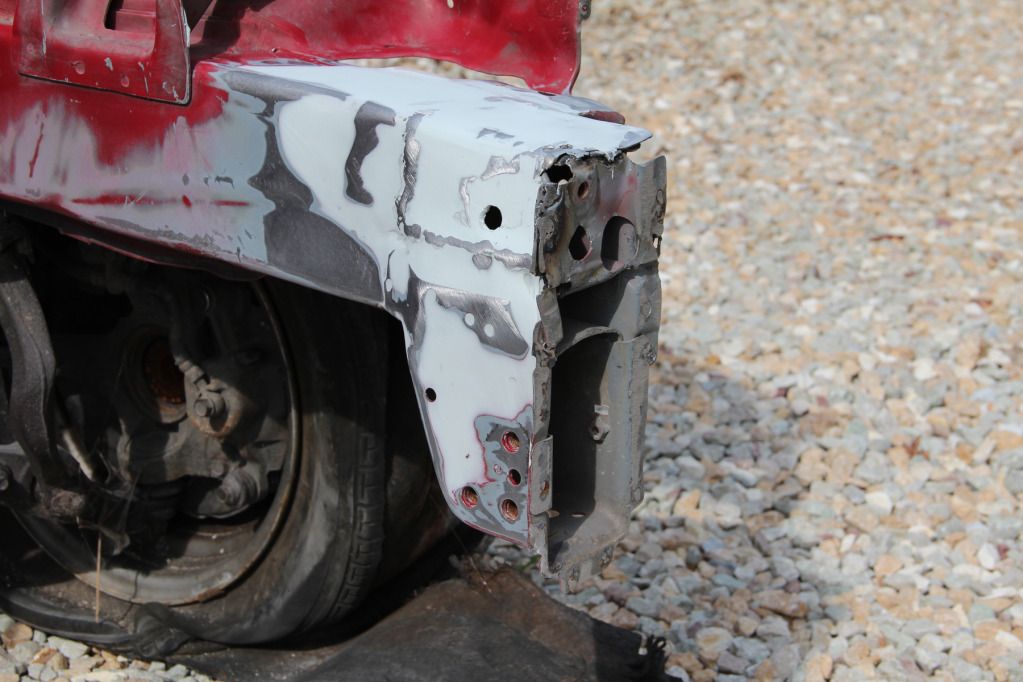
Thursday morning, I laid a solid bead along every cut line, and also along every other seam in the area, even if it wasn't welded from the factory. Covered up the welds with some body filler, and even though it's not perfect, it's better than the passenger side from the factory, so after it's primed and painted, I'll be happy.
[CENTER]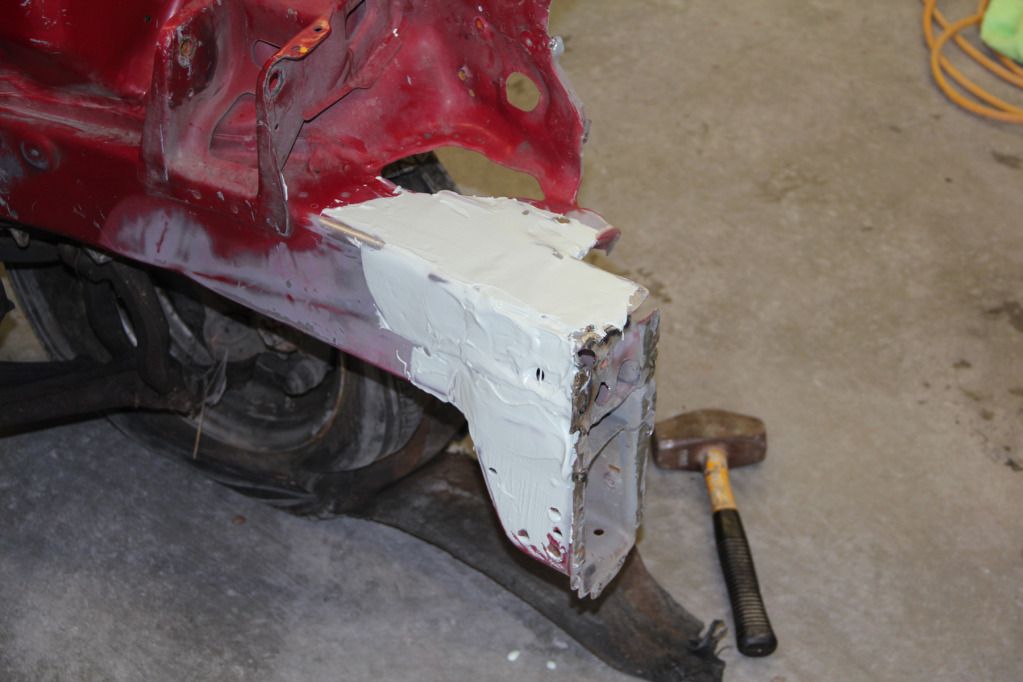
[/CENTER]
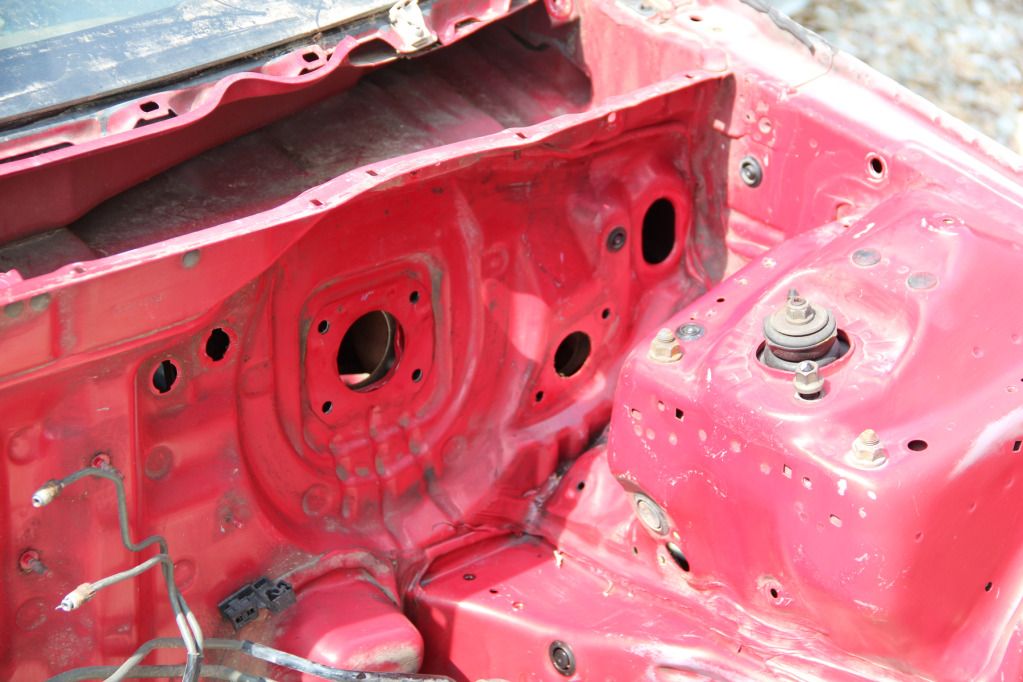
Removed the Brake Booster and the Clutch Slave for when I go to paint:
[CENTER]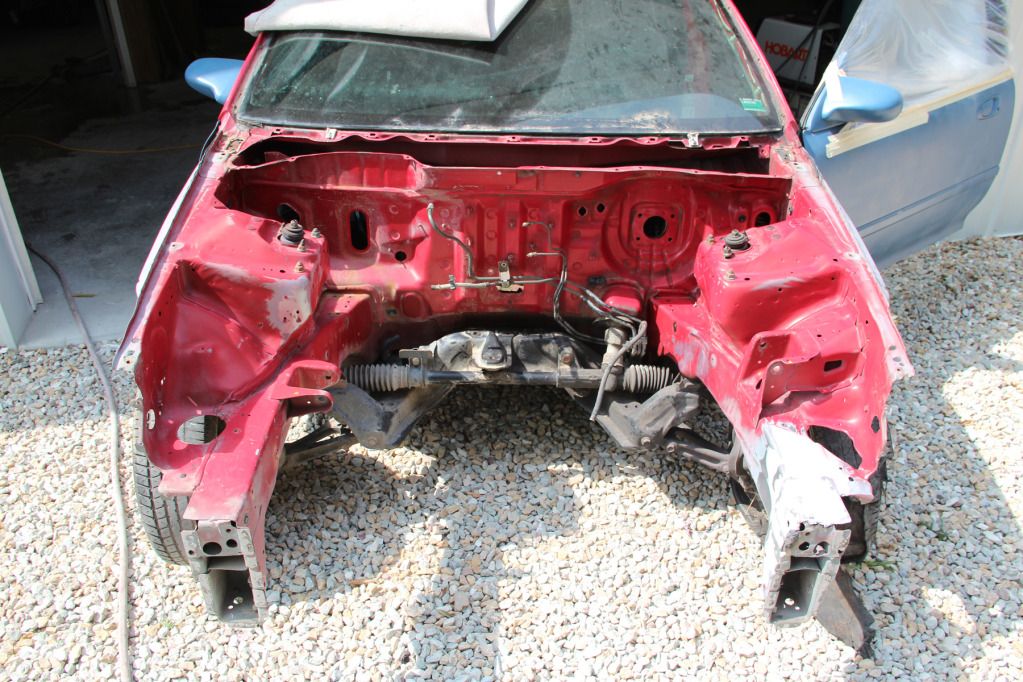
 [/CENTER]
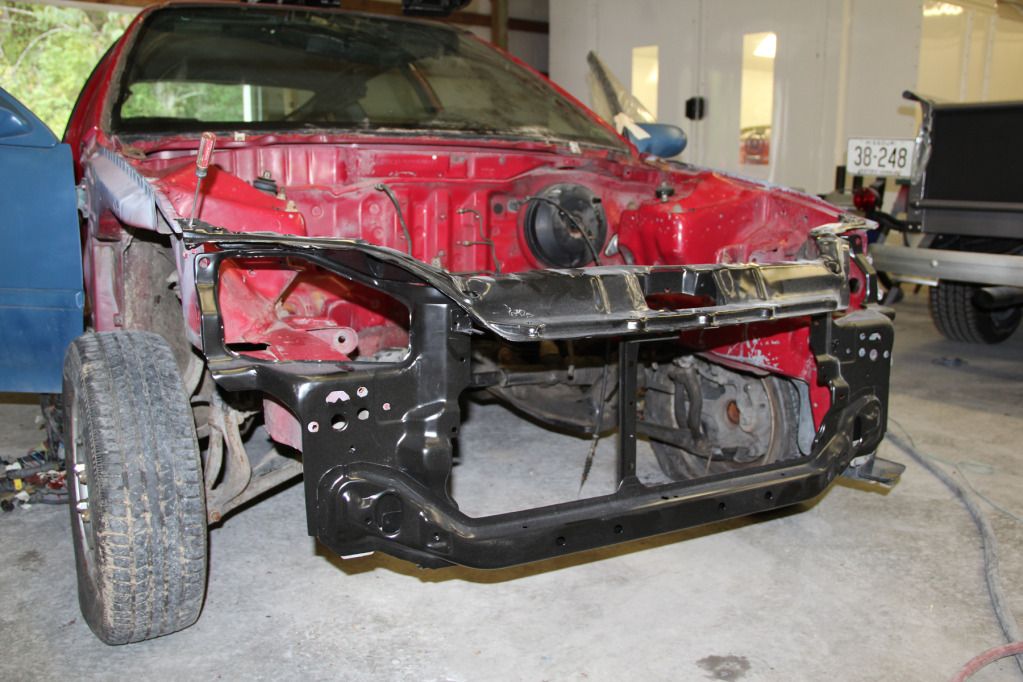
I test fit the radiator support but didn't get around to actually welding it since I wanted to leave it off while doing the body work on that frame rail. Doesn't look like the accident messed up much more than the front tip of the rail since the fender support on the driver's side lines up awfully well with the rad support.
[CENTER]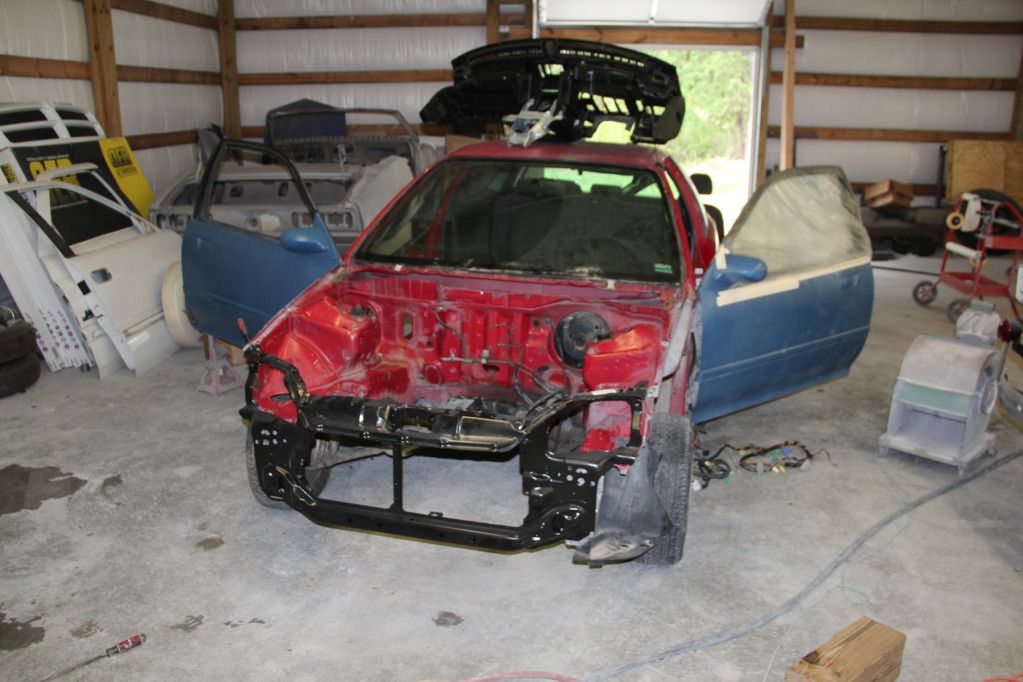
 [/CENTER]
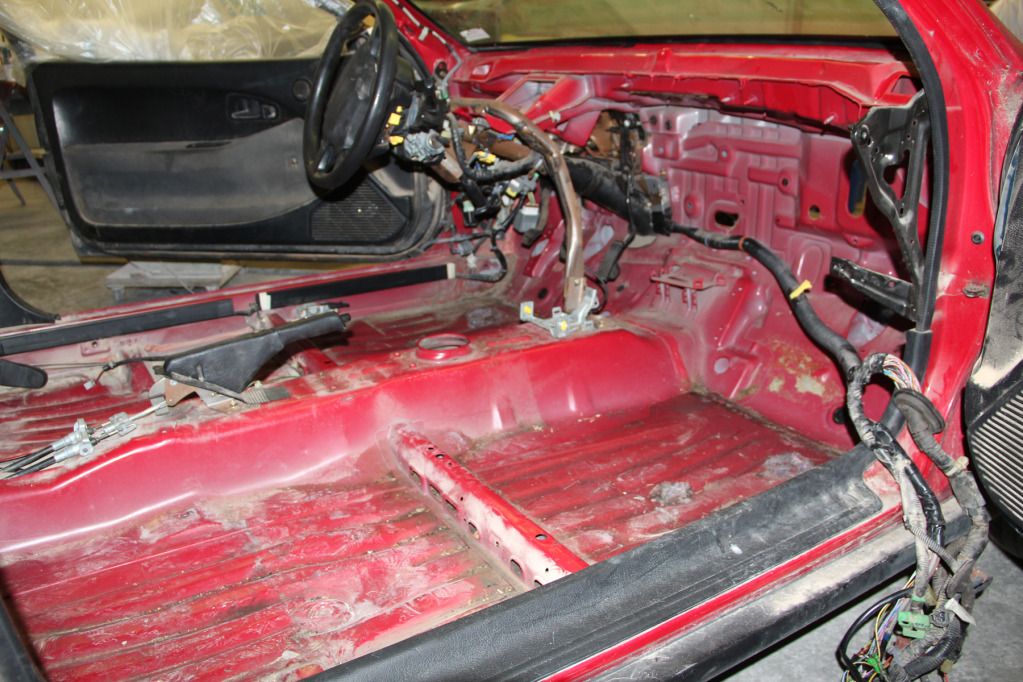
Removed the rear lower seats and the SRS as well (SRS is gone permanently, and as of this moment, I'm planning a rear seat delete. That could change though).
[CENTER]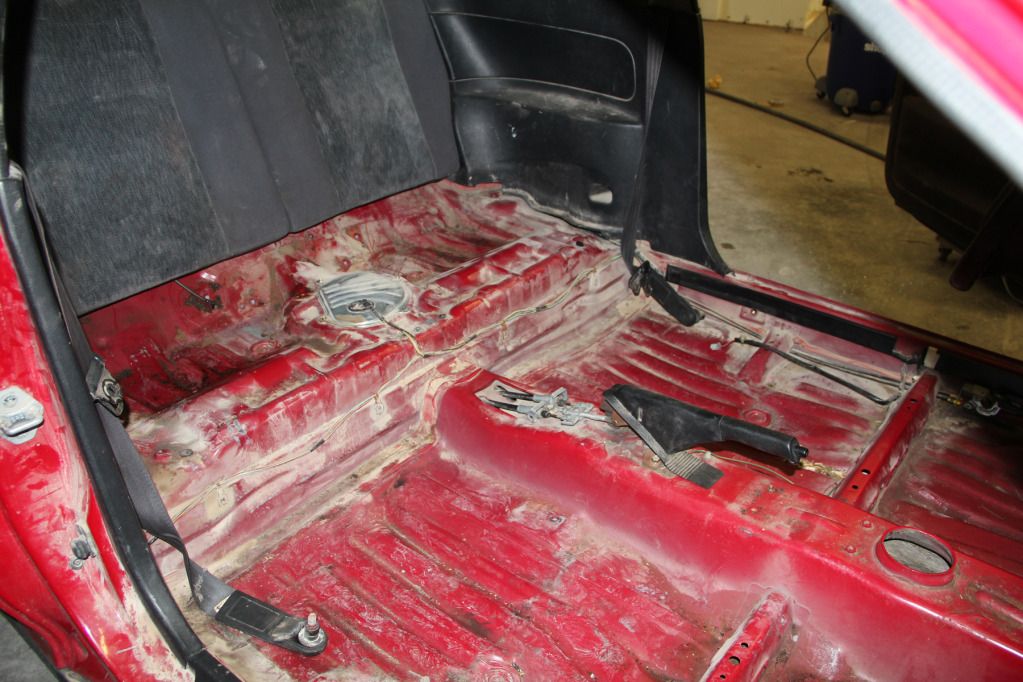
 [/CENTER]
It's interesting to note that below the rear seats it's wet with so much mouse urine. The entire interior will be getting a THOROUGH cleaning before anything goes back in.
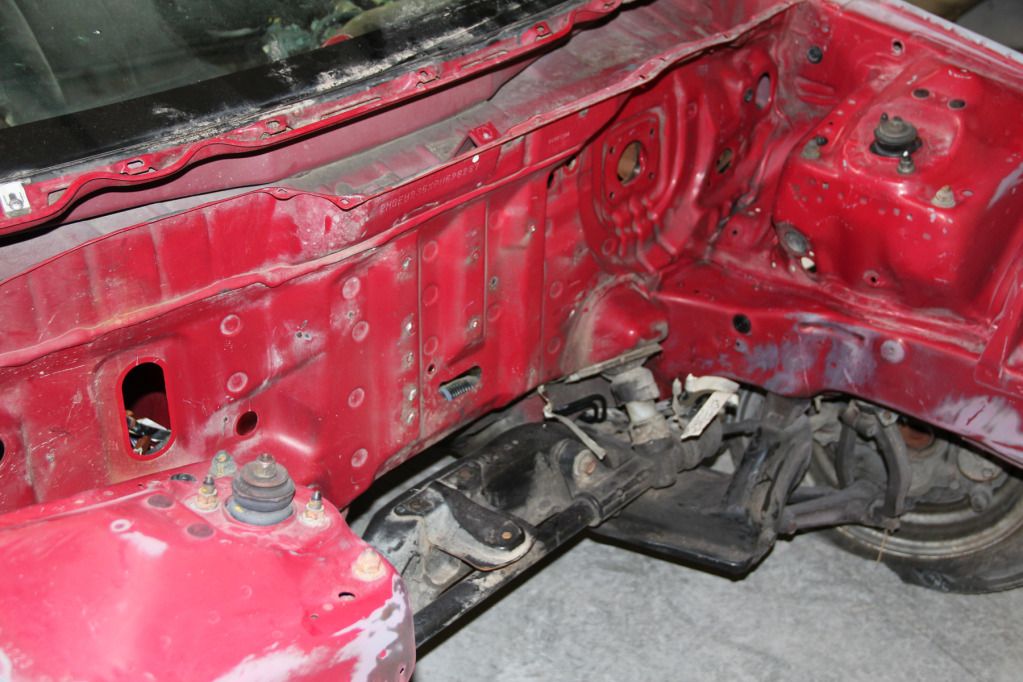
Trimmed back the fuel line to where I'll be converting to SS braided (I think. I might start it under the car if this way looks dumb). Also trimmed the rear brake lines, just to get them out of the bay since they'll eventually be cut towards the middle of the car and routed into bulkheads to the interior where the prop valve will be relocated. This is about as bare as the bay will get before primer and paint start getting laid.
[CENTER]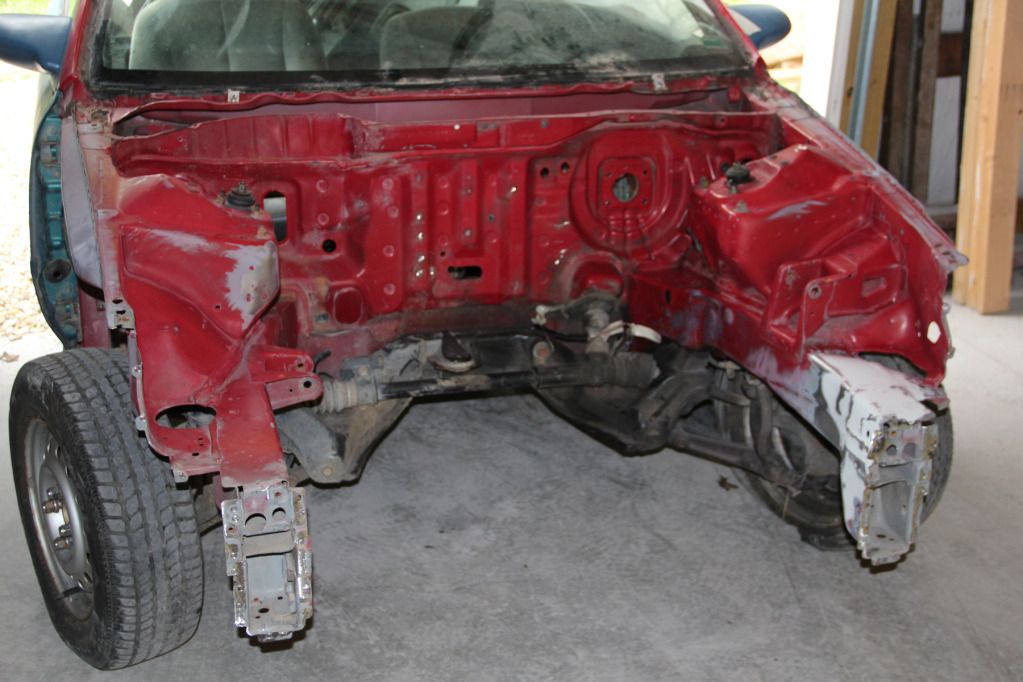
 [/CENTER]
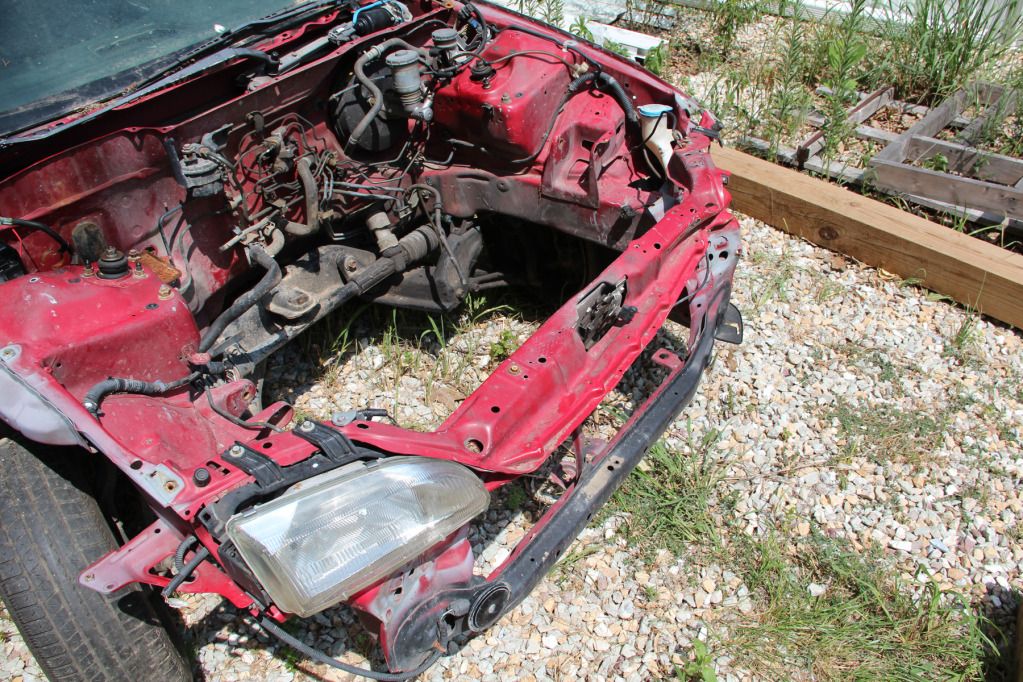
It's a far cry from where it was:
[CENTER]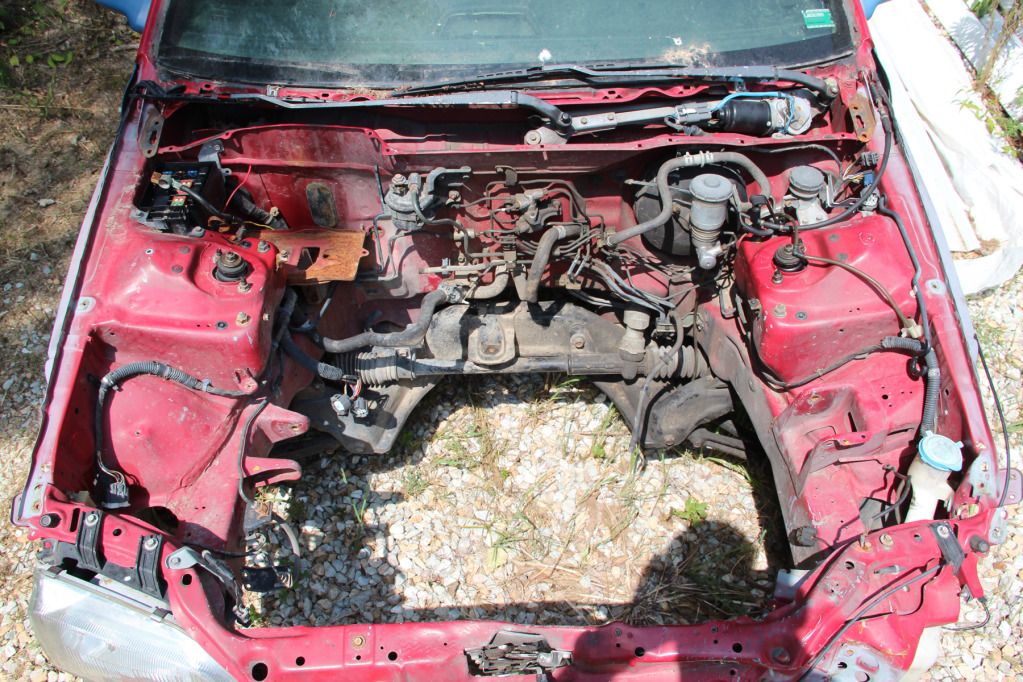
 [/CENTER]
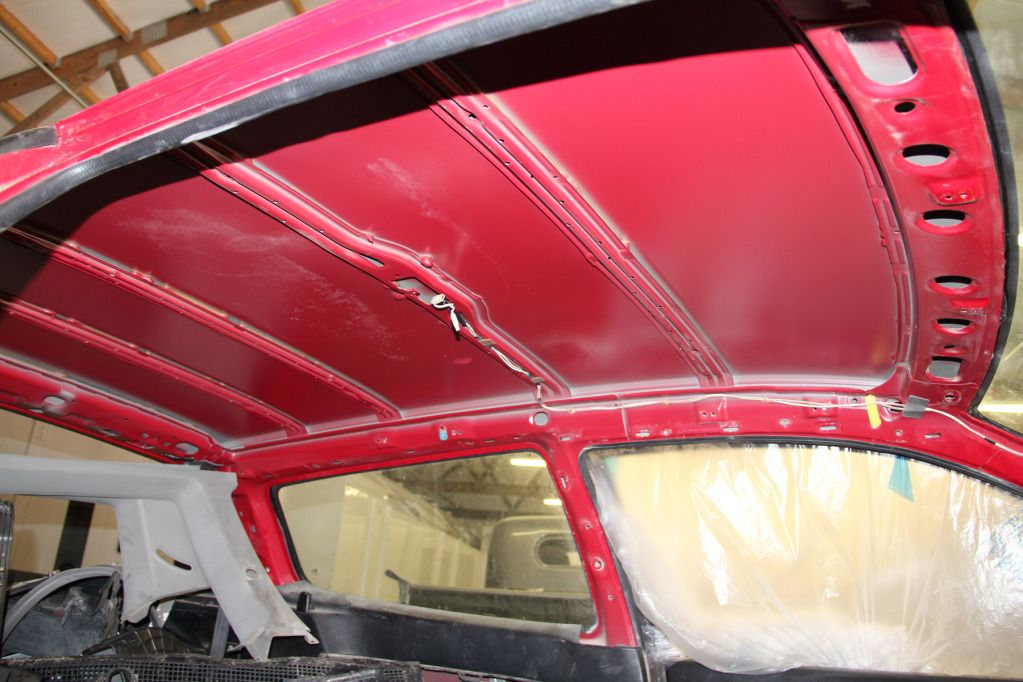
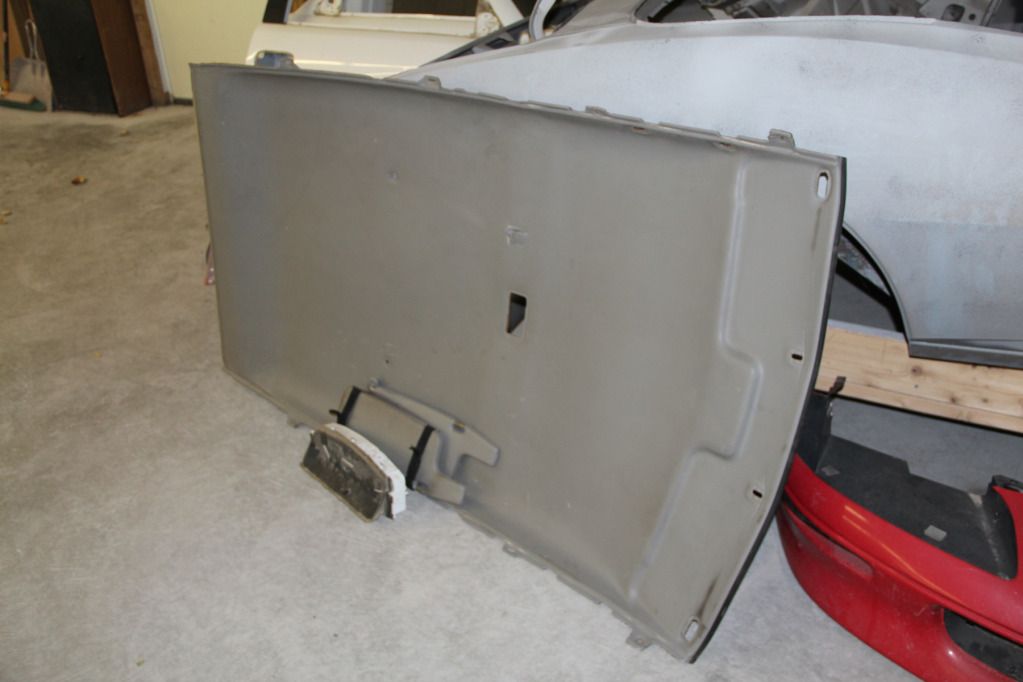
Finished removing the rear seats and the headliner, along with a few other interior pieces. Considering redoing the headliner in a more 'inviting' fabric since the vinyl is pretty shot as it is. Sorry for the pile of parts in the rear. They have to be easily moved in and out of the shop to save room for other cars. :shrug:
[CENTER]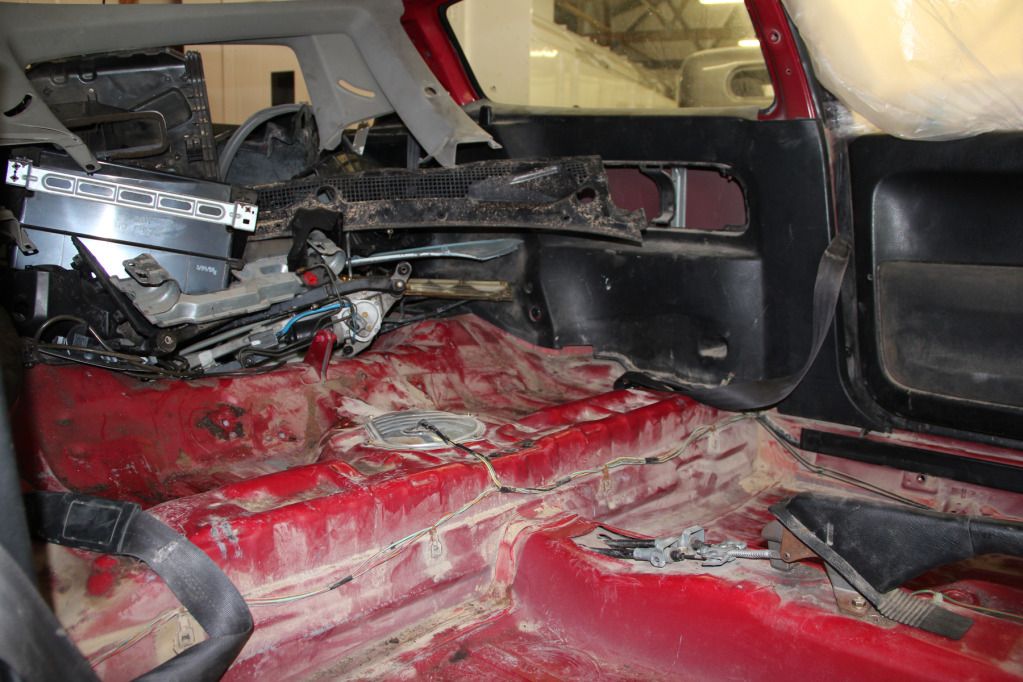
 [/CENTER]
That's about it. It's not much, but it puts me in a REALLY good position for my next few days of work on the car (next week) when I go to route the brake lines, and maybe start priming the bay? I'll leave you with some pics of the hatch sitting with a few roommates. Lol.
[CENTER]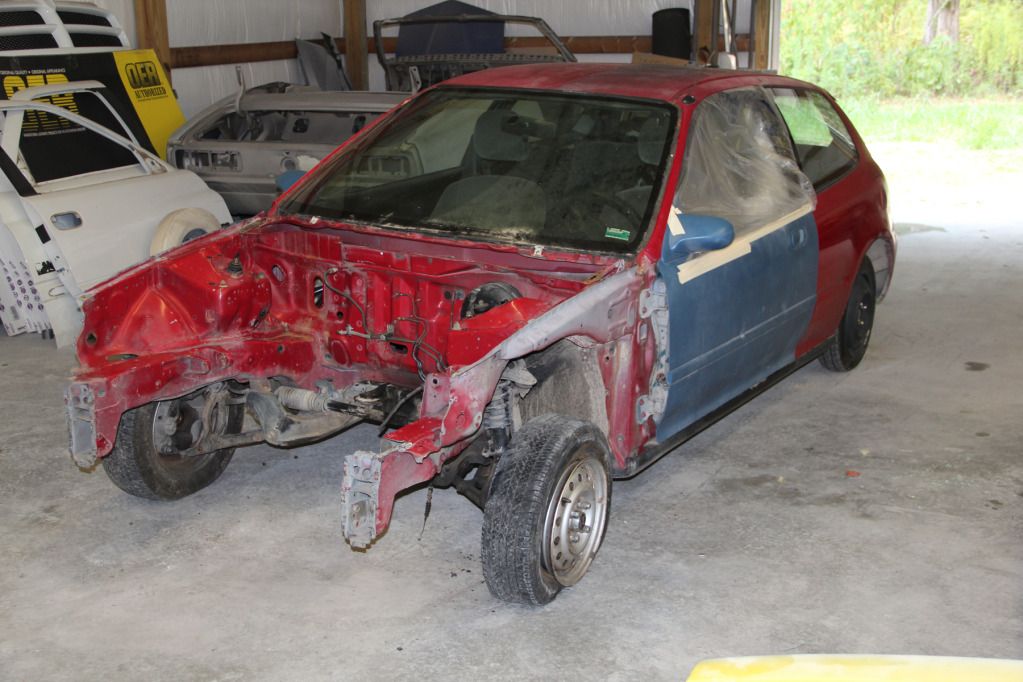
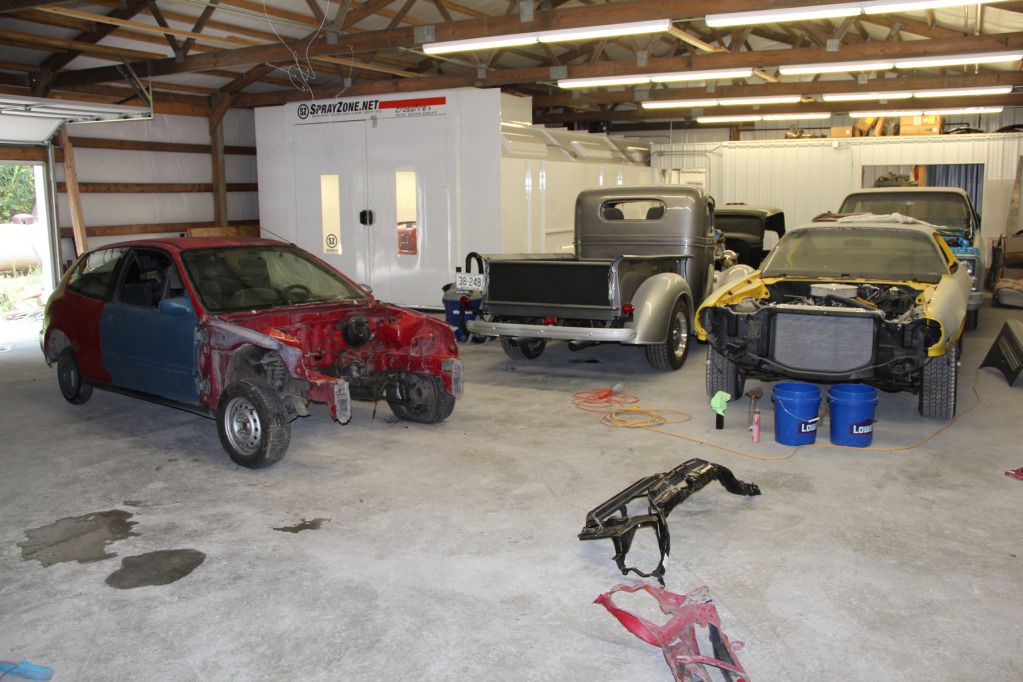
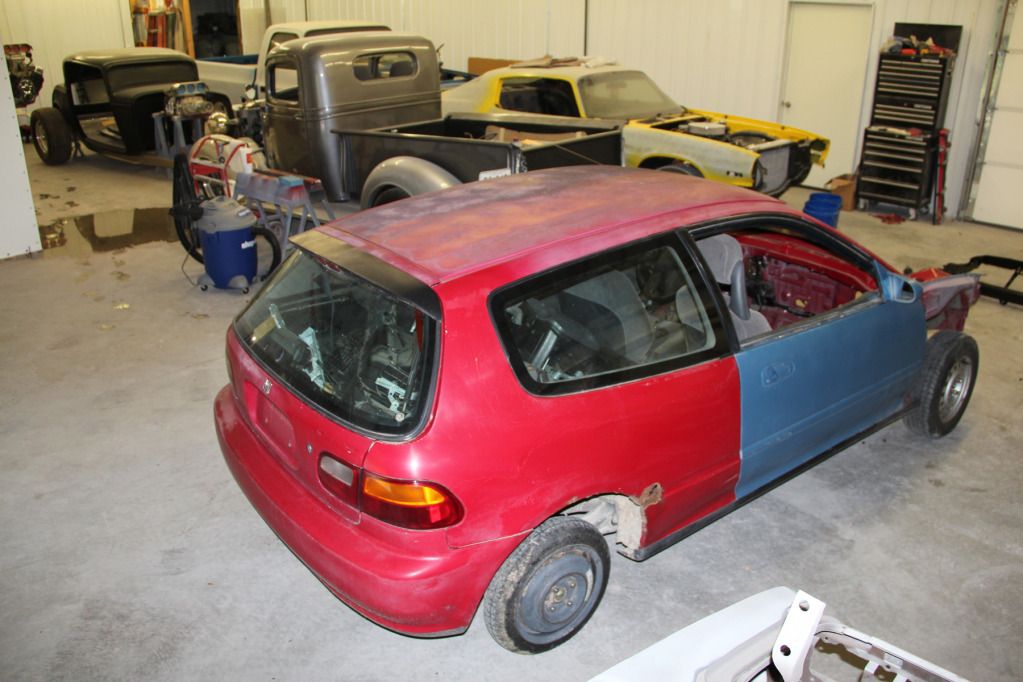 [/CENTER]
More to come soon I'm sure. Might start tearing a motor apart in the next few days.
I dropped my VC off at Gateway Powder Coating Wednesday morning after work. He's charging me $75 to chemical dip to remove the oil & grease, sandblast, powder coat the VC in a wrinkle red finish, and to brush the letters and H emblem after it's coated. I'm pretty ecstatic about the price and excited to see it finished. Turn around time is around 3 days for him, but I told him it's not a huge rush since I won't need it for at least a week or two. Very impressed with his customer relations so far.
I started off Wednesday morning with this view after removing my seats (they are just sitting in place, not bolted in or anything).
[CENTER]
[/CENTER]Then I removed the dash:
[CENTER]
[/CENTER]And I also removed the carpet since the whole car smelled like mouse urine. What I found behind the thick rubbery piece on the firewall was about 1,000 (literally) ants and winged bugs.
[CENTER]
[/CENTER]I sucked them all up with the ShopVac and was glad it was 'just' bugs, and not mice like I expected. After removing the carpeting though, there were shells everywhere; evidence that mice had definitely been in the car for a while, but I already knew that since we saw one when we loaded the car on the trailer at Caleb's. Here's a shot with the carpeting removed, and I think the driver's side was vacuumed already when I decided to take a pic.
[CENTER]
[/CENTER]Then I drilled out the spot welds on the radiator support and removed it, revealing a lot more damage to that driver's side frame rail than I thought.
[CENTER]
[/CENTER]I tried working that sheet metal as much as possible, but I couldn't get it to a place where I felt comfortable welding the new support to it, or safe driving with it crunched so far already. So, I removed the bent part, and reformed it off the car where it was a lot easier to deal with.
[CENTER]
[/CENTER]And after working it some:
[CENTER]
[/CENTER]Thursday morning, I laid a solid bead along every cut line, and also along every other seam in the area, even if it wasn't welded from the factory. Covered up the welds with some body filler, and even though it's not perfect, it's better than the passenger side from the factory, so after it's primed and painted, I'll be happy.
[CENTER]
[/CENTER]
Removed the Brake Booster and the Clutch Slave for when I go to paint:
[CENTER]
[/CENTER]I test fit the radiator support but didn't get around to actually welding it since I wanted to leave it off while doing the body work on that frame rail. Doesn't look like the accident messed up much more than the front tip of the rail since the fender support on the driver's side lines up awfully well with the rad support.
[CENTER]
[/CENTER]Removed the rear lower seats and the SRS as well (SRS is gone permanently, and as of this moment, I'm planning a rear seat delete. That could change though).
[CENTER]
[/CENTER]It's interesting to note that below the rear seats it's wet with so much mouse urine. The entire interior will be getting a THOROUGH cleaning before anything goes back in.
Trimmed back the fuel line to where I'll be converting to SS braided (I think. I might start it under the car if this way looks dumb). Also trimmed the rear brake lines, just to get them out of the bay since they'll eventually be cut towards the middle of the car and routed into bulkheads to the interior where the prop valve will be relocated. This is about as bare as the bay will get before primer and paint start getting laid.
[CENTER]
[/CENTER]It's a far cry from where it was:
[CENTER]
[/CENTER]Finished removing the rear seats and the headliner, along with a few other interior pieces. Considering redoing the headliner in a more 'inviting' fabric since the vinyl is pretty shot as it is. Sorry for the pile of parts in the rear. They have to be easily moved in and out of the shop to save room for other cars. :shrug:
[CENTER]
[/CENTER]That's about it. It's not much, but it puts me in a REALLY good position for my next few days of work on the car (next week) when I go to route the brake lines, and maybe start priming the bay? I'll leave you with some pics of the hatch sitting with a few roommates. Lol.
[CENTER]
[/CENTER]More to come soon I'm sure. Might start tearing a motor apart in the next few days.
John 3:16-17
-
lurch95hatch

- Posts: 455
- Joined: Wed Dec 14, 2011 10:16 pm
'93 Hatch DD Build
Daaaaaannng! Good job
1995 Civic CX Hatchback (work in progress)
2001 Civic LX Four Door (stock as the day she was born)
2001 Civic LX Four Door (stock as the day she was born)
-
Andrew
- Posts: 1000
- Joined: Mon Jun 29, 2009 3:28 pm
'93 Hatch DD Build
Hell yeah!
'93 Honda Civic VX - 35mpg+ Boosted Daily Driver
'93 Acura Integra - In progress, wire tuck, brake line tuck, Budget Built. :gape:
'93 Acura Integra - In progress, wire tuck, brake line tuck, Budget Built. :gape:
-
skittle_107

- Posts: 423
- Joined: Tue Nov 20, 2007 3:21 pm
-
HardCore97

- Posts: 2590
- Joined: Thu Nov 30, 2006 10:57 pm
'93 Hatch DD Build
awesome work! glad you got it instead of the other kid who just wanted it to fill with scrap and take to the junkyard. much rather see someone save it and use it
i may not be "logical" but at least i can change my oil...
Racecore.com
Racecore.com
-
jpfeffer
- Posts: 96
- Joined: Thu Jan 26, 2012 8:49 pm
'93 Hatch DD Build
Thanks!lurch95hatch;298962 wrote:Daaaaaannng! Good job
Thank you!Andrew;298964 wrote:Hell yeah!
Oh my gosh, I would have been so upset if this car had been junked like that. It was/is perfect for what I want.HardCore97;298972 wrote:awesome work! glad you got it instead of the other kid who just wanted it to fill with scrap and take to the junkyard. much rather see someone save it and use it
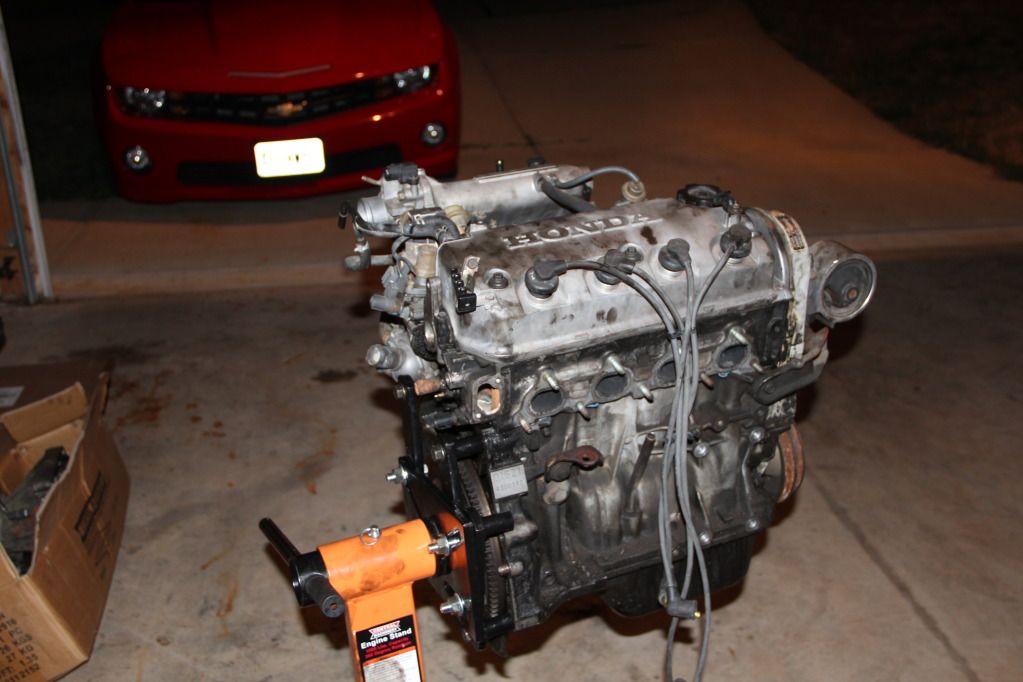
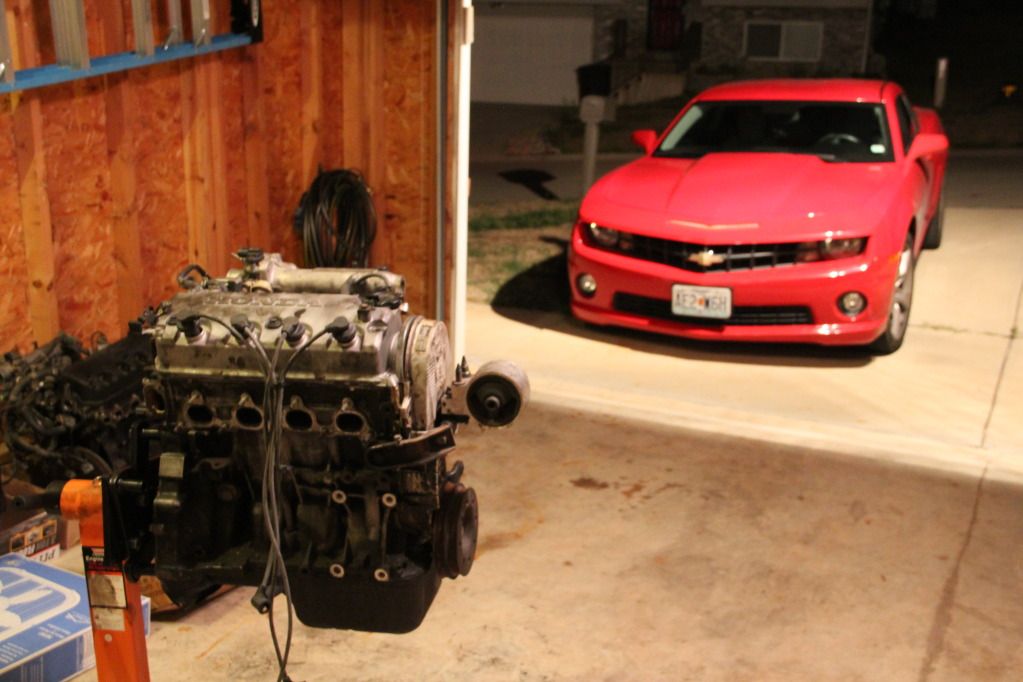
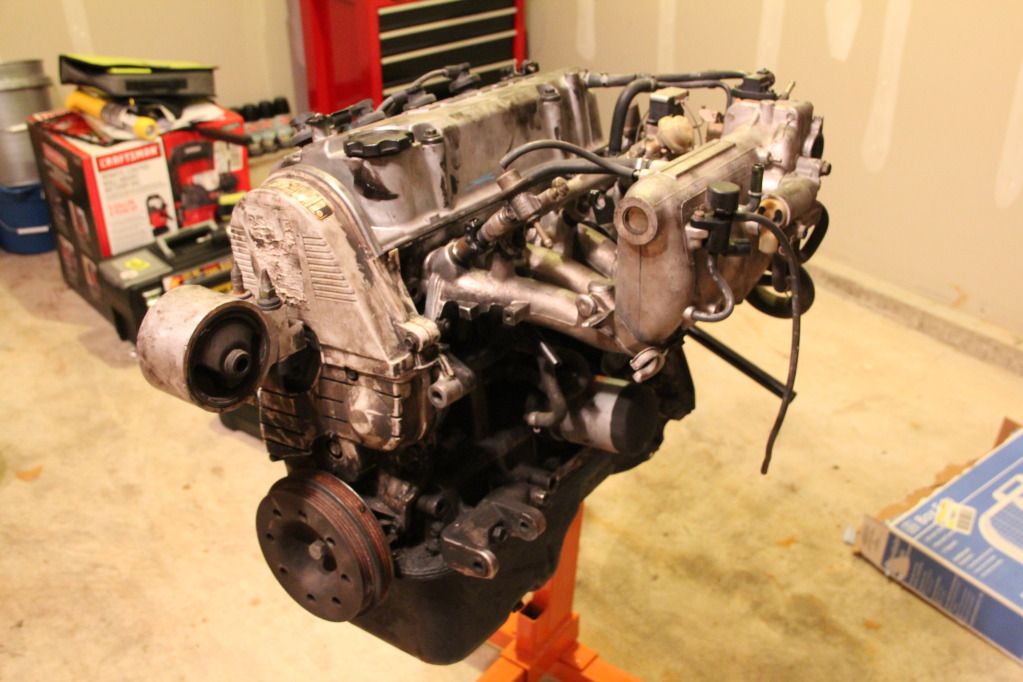
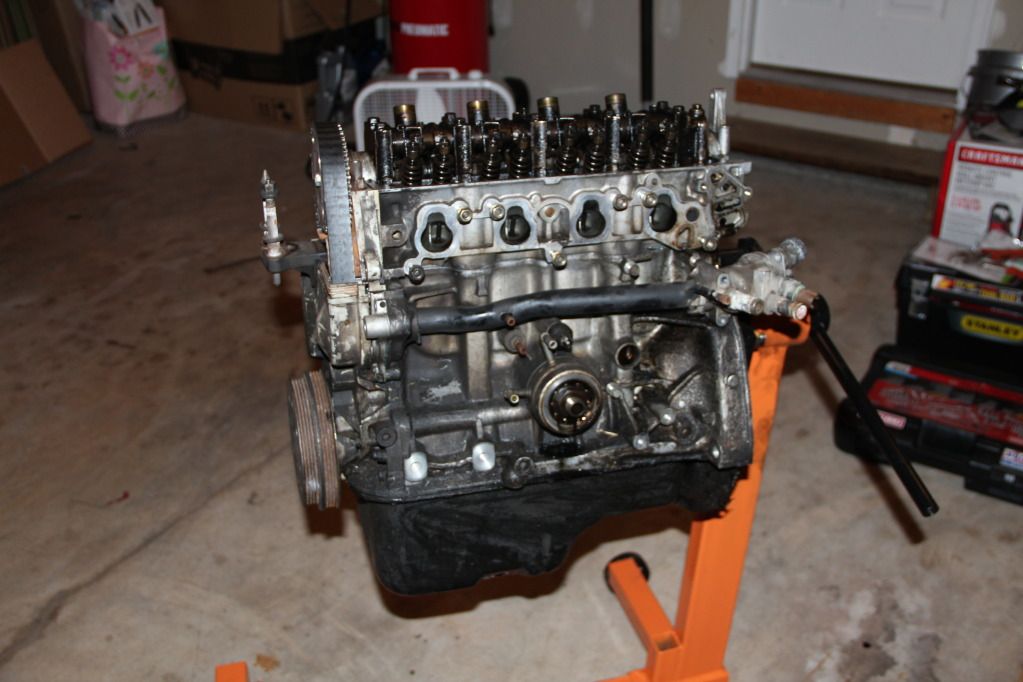
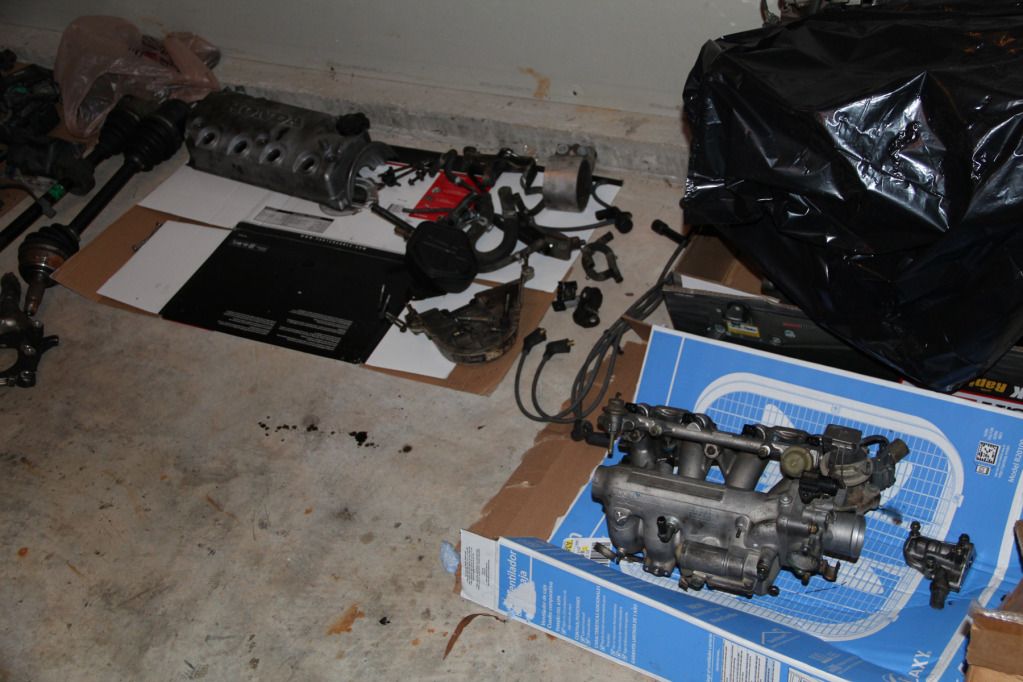
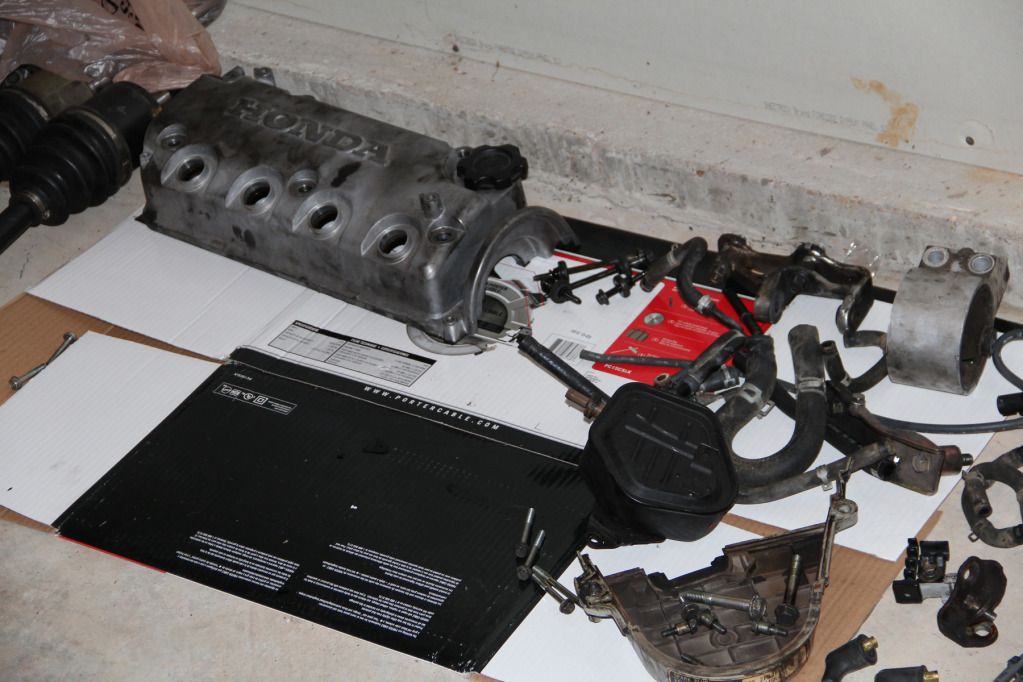
Started tearing down the motor. Didn't get very far before I ran into some bolts that I needed air assistance for, and that was out of the question at 3 am, so I called it a night and cleaned up. Got most of the brackets, the VC, the intake, and a few other things off. Anyone have any tips or tricks on how to remove the crank pulley and the timing belt pulley with the motor out of the car? Going to be doing that soon. Thanks again for looking!
[CENTER]
 [/CENTER]
After:
[CENTER]
 [/CENTER]
John 3:16-17
-
SikofFalln
- Posts: 1065
- Joined: Tue Nov 28, 2006 6:50 am
-
jpfeffer
- Posts: 96
- Joined: Thu Jan 26, 2012 8:49 pm
'93 Hatch DD Build
I might! Just depends on when I think I'll have time. I don't want to borrow it and then not use it for a month, ya know? Luckily, I know where you work so getting it from you wouldn't be a big deal. Lol.SikofFalln;299007 wrote:Coming along nicely! I have a Honda crank pulley tool if you need it.
Trying to find the time for more updates everyone. I feel like I'm slacking. But I'm working three 12s then a 16 this weekend, so I don't have much free time or energy. Should be working on the car again on Tuesday, and maybe on Friday? Once I finish all of my summer class work, I'll have more spare time to crank out the work on the motor too. Should be picking my VC up the first part of this week.
New hood latch just showed up since the old rad support was junk.
Is the crank bolt a stretch bolt on the D series or can I reuse it? Can't seem to find them for sale anywhere, and none of the 'How To's' on timing belt replacements mention getting a new bolt. Just want to be sure I'm not going to lose a pulley as soon as I fire the engine the first time. Had that happen in a C5Z06 after a cam swap, but luckily the front suspension kept the pulley from moving too far forward. Trying to be ahead of the game on this one.
John 3:16-17