Let's race our d15s
I'm kidding but good to hear it'll be running soon
Free hatch for me
-
Andrew
- Posts: 1000
- Joined: Mon Jun 29, 2009 3:28 pm
Free hatch for me
'93 Honda Civic VX - 35mpg+ Boosted Daily Driver
'93 Acura Integra - In progress, wire tuck, brake line tuck, Budget Built. :gape:
'93 Acura Integra - In progress, wire tuck, brake line tuck, Budget Built. :gape:
-
stolle
- Posts: 2241
- Joined: Wed Nov 08, 2006 5:47 pm
Free hatch for me
92egdxhatch;213688 wrote:Let's race our d15s
I'm kidding but good to hear it'll be running soon
its got a d16 but i doubt it would matter a race would be fun, im hoping to have it gateway next year whether its fast or not... :biggrin:
Team NOCO Crew Member #2

-
stolle
- Posts: 2241
- Joined: Wed Nov 08, 2006 5:47 pm
Free hatch for me
got some done on the wiring last night...
obd1 distributor and o2 sensor plugs added.

injector sub harness pinned into the stock harness i used to the two wires that originally went to the tandem valve control solenoid for the two extra injectors so it looks nice and clean.

the harness was taken apart and all wires where added true to the stock obd1 color codes so it will look factory when im finished.

the only non honda wires im using is this its 16awg wire wrapped in the braided ground wire of rg6 coaxial cable and wrapped up. basically i made my own shielded signal wire for the ckp sensor.

about finished with the engine side then its on to the ecu side, thanks for looking...
obd1 distributor and o2 sensor plugs added.
injector sub harness pinned into the stock harness i used to the two wires that originally went to the tandem valve control solenoid for the two extra injectors so it looks nice and clean.
the harness was taken apart and all wires where added true to the stock obd1 color codes so it will look factory when im finished.
the only non honda wires im using is this its 16awg wire wrapped in the braided ground wire of rg6 coaxial cable and wrapped up. basically i made my own shielded signal wire for the ckp sensor.
about finished with the engine side then its on to the ecu side, thanks for looking...
Team NOCO Crew Member #2
-
stolle
- Posts: 2241
- Joined: Wed Nov 08, 2006 5:47 pm
Free hatch for me
all the wring is finished besides wrapping the harness im not going to do that until i get the intake installed and test fire the engine. i only had to add 3 extra wires under the hood everything else i reused things that where not used anymore, i use the yel/blk that went to the secondary fuel injector and extended it for the yel/blk on the o2 sensor, grn/wht for the o2 got soldered onto the grn/wht sensor ground that was already there the wht wire went to the wht that was there, orn/blk was the only wire i had to run extra for the o2.
the yel/blk that went to the main fuel injector is now connected to all 4 of the yel/blk's on the injectors. the existing injector wires were used along with the 2 wires that went to the tandem valve control solenoid the orn is now injector 1 and the blk/yel is injector 3. the blk/yel had to be depinned from the ground junction under the dash and the wire was extended under the dash to the ecu. this allowed me to have all the injectors wired and pinned to existing wires under the hood using the stock plug and not adding any wires outside the harness.
the extra wires for the ckp were added to the harness with shielded wire the shield was grounded to the blk/red wire so once the harness is wrapped it wont be seen. everything should look like its supposed to be there not just thrown in and made to work. thats the plan anyway, i forgot to take pics of the engine harness, im hoping this will help someone else thats wanting to convert to mpfi and obd1 at the same time...
this is the GUIDE i used, i didnt follow it completely i made my own changes, i just hope its right...
Team NOCO Crew Member #2
-
stolle
- Posts: 2241
- Joined: Wed Nov 08, 2006 5:47 pm
Free hatch for me
someday it will run...
if i ever get to work on it...
someday...
:PDT_sad:
if i ever get to work on it...
someday...
:PDT_sad:
Team NOCO Crew Member #2
-
stolle
- Posts: 2241
- Joined: Wed Nov 08, 2006 5:47 pm
Free hatch for me
looks like i spoke too soon, i left work early today and got some things done on the car. finished the harness, put the intake on, throttle body, tps sensor, hooked up the radiator and fan, replaced the cap and rotor, replaced the o-ring on the distributor, put the distributor on, put in the o2 sensor, plugged everything in, put the battery back and...
i went ahead and tried to start it, wouldnt start, i was very disappointed, i checked the plug wire order, i had it wrong switched them around and first turn of the key it fired right up... now i am very happy... :biggrin:
still not finished i have few items to take care of i need the coolant hose that goes from the intake to the t-stat housing, an air intake, and a few other little things for the engine then its done...for now...
Team NOCO Crew Member #2
-
Rich
- Posts: 1175
- Joined: Mon Mar 02, 2009 7:31 am
Free hatch for me
Congrats man!!
2008 Chevy Slobalt
Understeer is when you hit the wall with the front of the car and oversteer is when you hit the wall with the rear of the car.
Horsepower is how fast you hit the wall, torque is how far you take the wall with you.
Hope this helps
Yes I own 2 slow red chick cars & 1 real car!
Understeer is when you hit the wall with the front of the car and oversteer is when you hit the wall with the rear of the car.
Horsepower is how fast you hit the wall, torque is how far you take the wall with you.
Hope this helps
Yes I own 2 slow red chick cars & 1 real car!
-
Don Napier
- Posts: 37
- Joined: Thu Jun 28, 2007 3:04 pm
Free hatch for me
good luck with your build.
-
stolle
- Posts: 2241
- Joined: Wed Nov 08, 2006 5:47 pm
-
stolle
- Posts: 2241
- Joined: Wed Nov 08, 2006 5:47 pm
Free hatch for me
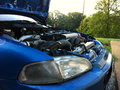
heres some pics and a short vid, i think it sounds pretty damn good, valves need to be adjusted bad.
[ame="http://www.youtube.com/watch?v=vfMmaOq_E7c"]YouTube- the hatch runs.wmv[/ame]


i went and got the parts i needed too, oil and a filter...
[ame="http://www.youtube.com/watch?v=vfMmaOq_E7c"]YouTube- the hatch runs.wmv[/ame]
i went and got the parts i needed too, oil and a filter...
Team NOCO Crew Member #2